2013-05-01 Underway

After several days of checking lists, adding items, shopping for food, and multiple trips to Sanderling to load and store food, we got underway on our new Canadian adventure at 1205 on May 1st.

We stopped about two and a half hours later at Harbortown Marina to take on fuel, and about half an hour later had nearly full tanks and were off. Although the sky was overcast all day, the weather was decent with minimal wind.

About 1730 we anchored just north of the Titusville (Florida) marina and got settled in for our first night afloat. It seems like there are so many things to remember about how we have done things in the past, and other things that need to be done to get things in order for our long cruise. We stowed items that hadn’t already been put away, and relocated things that we felt were in the wrong place. The cats were fed and we prepared our first meal aboard, then in what would undoubtedly become our ritual we read for a short while and went to bed. Seems like all the fresh air results in an early bed time when we’re on Sanderling – much earlier than were we at home.

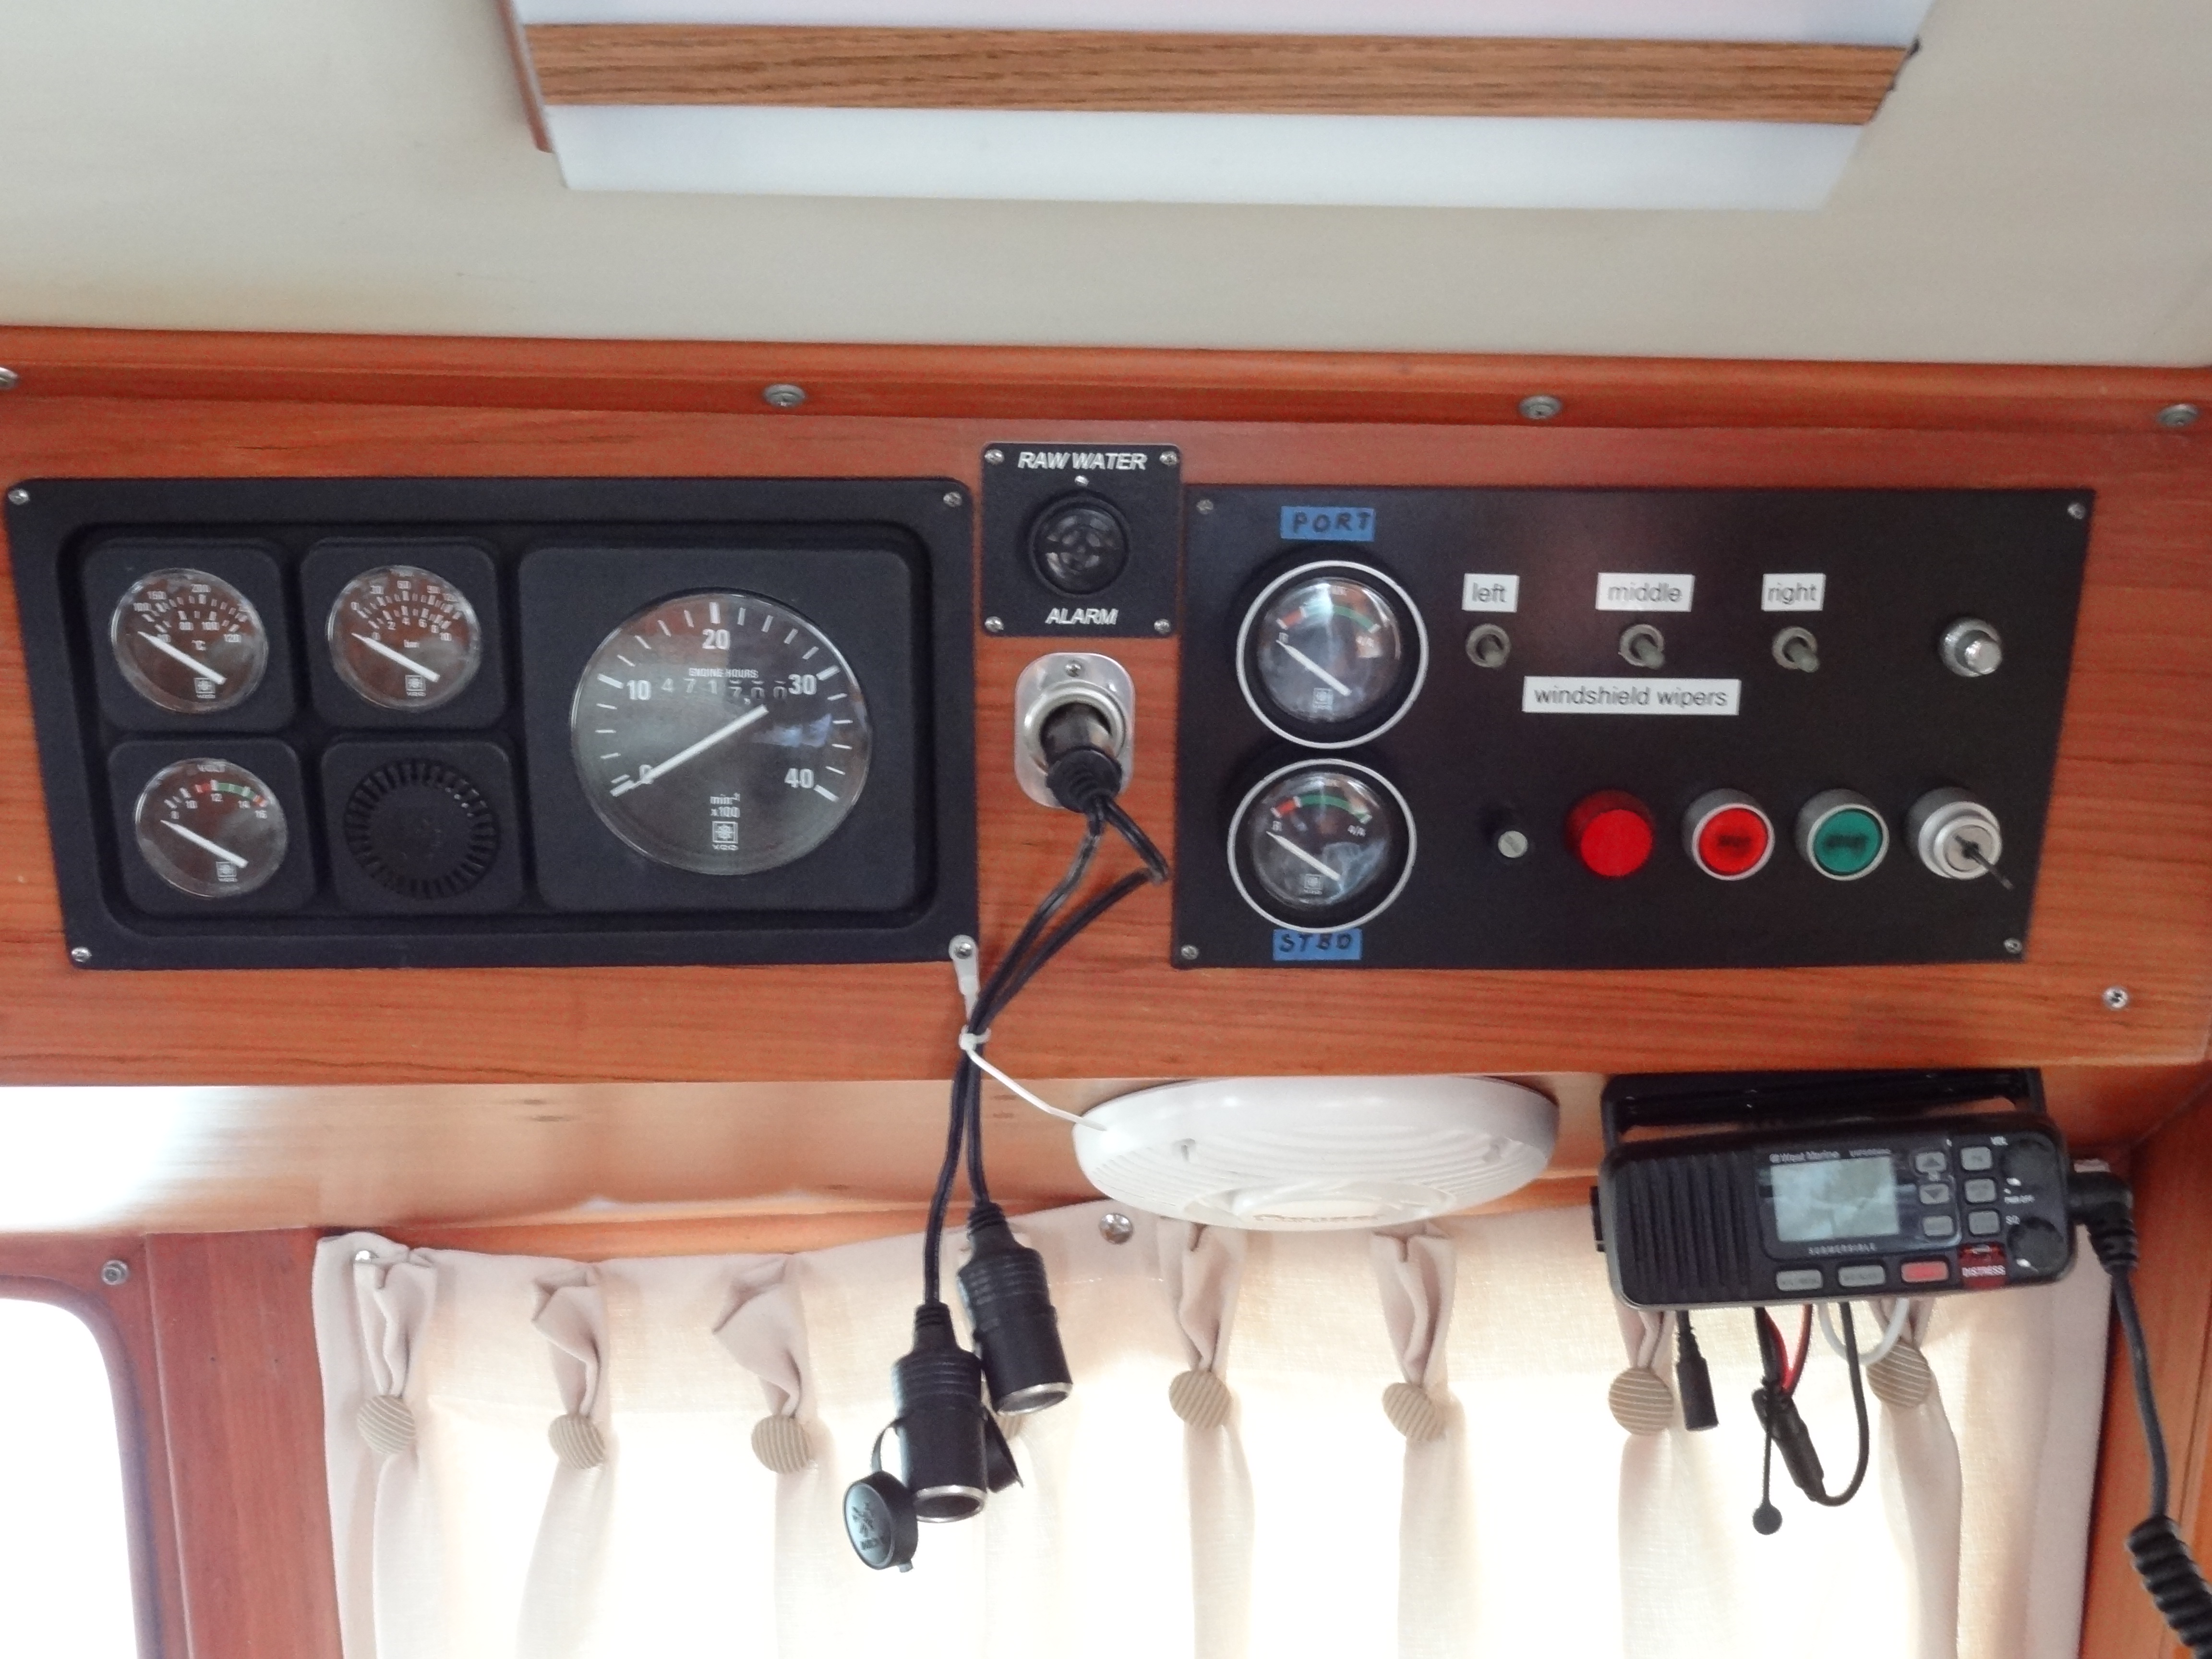
On Thursday we were underway about 0830 after feeding the cats, having our first cup of coffee, and checking the engine oil, other fluids, water pump belt, and generally making sure that everything was in order in the engine room.

We cruised much of the day on Thursday in windy conditions and rain. Tidal currents also slowed our progress in a few areas, and actually gave us a push in a few other locations. By the time we got to Daytona about 1530 it was too late in the day to get to our friends dock at Palm Coast (another 4 hours away). Consequently, we anchored at our “usual” spot in Daytona – just north of the Seabreeze Bridge. The weather forecast for the next few days was not good, with predicted wind from the E and ENE at gusts up to 40 and a lot of rain (flood warnings have been issued as I’m writing this), so we weren’t sure whether we’d get underway on Friday and attempt to get to St. Augustine, whether we’d try to get to our friend’s dock at Palm Coast, or whether we’d stay put in Daytona.

The anchorage where we’re located in Daytona is a good one for easterly winds, as we’re on the east side of the channel with the barrier island of Daytona Beach dampening the wind and the short fetch of water to our east (we’re about ¼ mile from the shore) lessening he effect of wind-driven waves.

After dinner we again checked with weather forecasts and radar images to try to get a feel for our options for Friday. We were hoping that we’d be able to get to St. Augustine or at the very least to our friend’s dock in Palm Coast.

There was quite a bit of rain and only a little wind on Thursday night. The rain facilitated the discovery of a couple of minor leaks at one port light (window) and at the deck on the starboard side, and a slight leak at the aft companionway hatch door which I thought we had eliminated several years ago. Looks like there’s a little more leak detective work in the offing as soon as we get some dry weather. Luckily for me, the aft companionway hatch leak is on Judy’s side of the bed! :-{)

Friday morning. The decision was made to stay at our anchorage in Daytona. The weather forecast for the area from Daytona to the Florida/Georgia border is for strong wind and a lot of rain by mid-morning and we felt that with our relatively large “sail” area (the part of the boat above the water) and wind from the east, cruising would be a uncomfortable, tiring and wet! Between Daytona and St. Augustine the ICW follows several different rivers with a few spots that are fully exposed to easterly winds and has only a few places to seek refuge. Although our friend’s dock is only 28 statute miles and about 4 hours cruising away, we anticipate that we will encounter the poor weather conditions before reaching their safe harbor. St. Augustine is out of the question, and once there the mooring fields are very exposed to easterly wind and the ICW at the St. Augustine inlet goes almost into the ocean and would be extremely rough and difficult to transit if the forecast conditions were accurate.

So, today (Friday) we stay put in St. Augustine. The weather to the north looks bad and the rain bands are hitting us frequently. So far we’ve had wind gusts approaching 20 MPH, but we anticipate more to come. I’ve removed the outer window covering from the forward saloon and side windows so we can see outside better and keep an eye on the conditions as they develop.

Now if only I could get our new Ubiquity WiFi antenna to pick up a local hot-spot!

More of the same is forecast for tomorrow.

Project: New AIS Transponder

After reading several blogs and discussions about cruising the inland rivers and on the strong recommendations of several Trawlers and Trawlering List subscribers and friends who have recently completed cruises of the inland rivers we felt that AIS was a good resource for safer navigation in an area frequented by big commercial tows and blind curves! Here is a brief description of our setup along with the hardware and software making it all work together. Sorry, there aren’t any pictures!

We’d already installed a WiFi network onboard connected to an Island Times radio antenna (powered by a Ubiquity bullet), so we were looking for an AIS that could interface with our WiFi network as well as provide NMEA 0183 data to our Garmin GPSMAP 545S and 545 chart plotters. We weren’t quite sure how it would all fit together, but knew is should be possible. We also wanted a unit that could display AIS position data on our laptop navigation software (Fugawi) and that might connect to everything using NMEA 2000 if we decide to upgrade to a more “modern” network interface.

After some searching we settled on the Vesper Marine XB-8000 transponder, a relatively new device (2012) from a company with a good reputation. You can read more about it here: http://www.vespermarine.com/xb. The reviews of the unit on Panbo lead us to believe this was just what we were looking for. For the AIS antenna we chose a Shakespeare Centennial Style 5104 Antenna. The XB-8000 came with a GPS antenna, but we purchased a 12 foot waterproof USB cable in order to reach from the mounted location topside to our lower steering station where we operate our navigation laptop. A short USB cable comes with the unit to use for configuration.

So for parts: Vesper Marine XB-8000 with GPS antenna; the Vesper Marine USB cable; and the Shakespeare 5104 antenna; an antenna mount from West Marine; some PVC from Home Depot for the GPS antenna mount. Except as indicated, everything was purchased from Defender.

Since the XB-8000 is a transponder (sends and receives AIS data) an MMSI (Maritime Mobile Service Identity) issued by the FCC is required prior to purchase. We had obtained our MMSI several months earlier, so we had it available to complete the AIS purchase form. We also had to decide in advance on the antenna’s location on the boat, since the form required that info; in retrospect, we could have provided any info regarding boat length, antenna location, etc, since that is readily changeable after purchase but the MMSI is fixed for the unit and cannot be changed.

The installation was fairly straight forward. Install the dedicated AIS antenna and run the cable; install the GPS antenna and run the cable; run the USB cable in an already tight channel between the upper and lower helm locations; install the 12 volt power line from the auxiliary electrical panel. Once the various lines and cables were in place, we connected the AIS unit to everything and powered the circuit. Green LED came on after about 45 seconds and we were in business. Next in the order of things was to get our laptops and chart plotters displaying the incoming AIS data.

At some point I installed the Vesper Marine program on our two laptops. This program, vmAIS, allows the laptop to configure the AIS unit; there is an iPhone/Pad app currently available to do the same thing via WiFi and an Android version will be available later. Since I’m an Android person (phone and Nexus) I have been using a laptop running vmAIS to configure the AIS unit.

I started getting connected using the USB cable since that seemed to be fairly straight forward. vmAIS connected right away once I had identified a comm port. I then configured the AIS unit to be part of our WiFi network (that can only be done using a USB connection) by following the simple directions in the setup manual and on the web site (uncheck one box, select the network you want to join, and provide a fixed DHCP address that your network will recognize). Simple enough.

At that point OpenCPN running on a new HP Ultrabook with Windows 8 was configured to access the AIS data over the WiFi – and the data started pouring in and after a little tweaking is displaying AIS ship position information. Hint: right click on the screen and then click on “AIS target list” for the list of targets.

Fugawi, on the other hand, can “see” only comm ports, not serial ports, so I initially used the USB cable to connect to an older laptop running Fugawi (actually, our “navigation” laptop) and set up Fugawi to see the correct comm port and the data started flowing in, providing our own location data as well as the AIS data from a boat transmitting an AIS signal about 4.5 miles away.

Even though both laptops were receiving data and at least Fugawi was showing the AIS provided ship location data, I wanted to see if there was a way to get the data via the WiFi network to Fugawi. Vesper Marine support provided the answer – a free program which takes a TCP connection and turns it into a Virtual Serial Port – hw_vsp found at http://www.hw-group.com/products/hw_vsp/index_en.html. Once it was configured to “see” the AIS unit, and Fugawi configured to see the virtual comm port, the data started flowing in wirelessly! How cool is that!

The only thing left to do was to connect the NMEA 0183 lines from the AIS unit to the Garmin chart plotter. The GPSMAP 400 and 500 series of plotters have a little quirk (perhaps all Garmin plotters share the quirk) in that the black ground line from the plotter also acts as the negative input/output line for any NMEA connection, so if you’re connecting an AIS that has a NMEA out (+) line that happens to be gray, and a NMEA out (-) line that is yellow, you connect the gray line (+) to the NMEA in line (+) on the Garmin and the yellow line (-) to the Garmin black ground circuit somewhere along the line. Only slightly confusing at first blush. However, once properly connected and the chart plotter configured the AIS ship contact info is displayed on the plotter.

At this point we have one laptop running Fugawi receiving AIS data over WiFi with a USB cable as an optional setup in case anything happens to our WiFi. The data provides both the standard GPS data (course, speed, etc) and the AIS data (ship’s position, speed, COG, CPA, etc). The Garmin chart plotter (only connected one at this point) displays roughly the same info, but (I think) uses it’s internal GPS for our ship’s position and course. Our second laptop running OpenCPN is also receiving data via WiFi and displaying AIS ship data.

To make matter more geeky and interesting, we’re using my Nexus tablet topside to display the navigation laptop screen (running Fugawi). To do this we’re using a Virtual Computer Network, running VCN software on both the navigation laptop and the Nexus (as well as my Android phone, if desired). This gives us both the chart plotter display and the laptop display at the topside steering station or at whatever other location onboard we wish to position the Nexus. We can do the same “magic” with the other laptop – display the navigation laptop screen on the second laptop – all wirelessly, of course! The VCN software on the Nexus and Android phone is AndroidVNC; The program on the navigation laptop is TightVNC; on the other laptop we’re running TightVNC Viewer.

There were a couple of minor issues along the line, but nothing that wasn’t quickly resolved by Vesper Marine’s support staff. Those issues were basically attributable to “operator error.”

Only a few weeks to departure

We’re getting close to our anticipated departure and making headway in getting some last minute projects completed. In March we were hauled at Eau Gallie Boat Works, our first haul out in two years. The yard applied three coats of bottom paint (5.5 gallons of Micron CSC) to the hull, stripped and epoxied the running gear, replaced the holding block (had worked its way loose two years ago in Canada) for the spurs, added ball valves in the fuel lines from each fuel tank,  fixed a ground problem, lubricated all the thru-hulls, and buffed and waxed the hull. The crew did a great job. We were back in the water 10 days after haul-out.

Since then, I’ve installed a Vesper Marine XB-8000 AIS Transponder with a dedicated VHF and GPS antenna, installed a raw water alarm from Borel Manufacturing, and built a new forward hatch seat/cover that will provide a much needed conversation area on the bow as well as allow us to keep the forward Bomar hatch open for ventilation while at anchor without worrying about rain soaking the V-berth area.

This weekend I cleaned the raw water heat exchanger and replaced the end cap gaskets, and replaced the raw water impeller with a new one from American Diesel.

Here are some pictures of some of the growth, the cutlass bearing housing where the old holding block was attached (three empty holes), the new spurs and holding block, the raw water alarm mounted in the engine instrument panel and the new hatch cover.

Barnacles on rudder shaft

Barnacles on rudder shaft

Barnacle on bow thruster

Barnacle on bow thruster

New paint, holding block and spurs

New paint, holding block and spurs

Barnacles and empty holes where holding block detached

Barnacles and empty holes where holding block detached

Raw water alarm mounted on engine instrument panel

Raw water alarm mounted on engine instrument panel

.

Forward hatch cover/seat

Forward hatch cover/seat

A Lot of Work Goin’ On For the Past Year

Despite the lack of updates to this blog, there has actually been a lot of work being completed on Sanderling since the last post in April 2012. We’ve been making a few changes, adding some new equipment and generally getting ready for our 2013 cruise to Canada (and the “loop”).

I’ll try to highlight the big changes with a few pictures, where available, to bring things up to date.
May 4, 2012 – Installed TAGO LED Deck Light with SS mounting brackets from Anchor Express F38-3500WHA-1 with an illuminated toggle switch from Radio Shack mounted in the overhead electronics cabinet in the saloon. This will be used to illuminate the foredeck when we need to get to the anchor windless in the dark, as well as provide extra boat illumination at night when anchored in any area with boat traffic. Since it’s an LED, it only draws 1/4 amp.

May 2012– Refinished three big interior deck plates as follows:

  • 1-Sand to bare wood with 60 and 150 grit paper then 2 coats of CPES and dry
  • 2-Sand with 220, then CPES – 1 coat until tacky, then 1 coat Captains Varnish
  • 3-Captains – 1 coat
  • 4-Captains – 1 coat
  • 5-Sand with 220 – Captains – 1 coat
  • 6-Captains – 1 coat
  • 7 poured Captains into still-open seams and brushed across seams in attempt to fill (not successfully)
  • Still needs sanding and more Captains but put back on boat to add more when we finish the entire interior boat deck.

June 9, 2012 – Replaced former Cal a/c pump forward a/c with new Teel pump from Mermaid @ $115.00. Had to remove Cal bracket and remount Teel against bulkhead. Old bracket, screws and circle clamps placed in bilge near pump for re-use if called for.

New fuel solenoid shutoff

Fuel solenoid shutoff from American Diesel

August 1, 2012 – Completed install of new fuel stop shutoff relay from American Diesel – part #510-0512 (with 30 amp inline fuse). Ran new #12 line (red) from starter motor to positive post on relay with fuse at starter. New fittings on original lines to fit posts. Made bracket to fit across bolt holes on engine from 1”-1 1/2” right angle pre-drilled slotted steel. With the new solenoid the engine shuts down every time (no more climbing into the engine room to manually pull the shutoff lever). Yes!

August 19, 20, 21, 2012 – Replaced old power/data cable on GPSMAP 546S with unit’s power/data/sounder cable. Working to get NMEA data connected and working. Had to recheck wiring and make changes. Radar and auto-pilot on output-2 circuit; feed to laptop and lower helm station is on output-1 circuit so it can be switched between NMEA and GARMIN output – Garmin when necessary for uploading/downloading GPS/route/track data to/from laptop.

New power/data cable for GPSMAP 546S provided at no cost by Garmin to replace non-working cable that came with the unit. All trouble-shooting with Garmin assistance indicated cable to blame. Now all NMEA circuits are working. Garmin has been told that original cable was bad and offered to send it to them, but they declined.

The 12 volt NMEA wiring now is very close to what is shown in this diagram:

Sept 22-24, 2012 – Installed PUCK AIRMAR P79 thru-the-hull sounder for CPSMAP 546S. Filled with mineral oil.

Oct 1-9, 2012 – Added two coats of Cetol gloss to all exterior brightwork, including hand and cap rails, eyebrow trim, windows and doors frame.2012-10-13 New inverter and wiring DSC01645

Oct 12&13, 2012 – Mark Richter installed a new Magnum S2312 Inverter/charger and associated wiring and monitor. We left the Xantrex Freedom 2000 in place to provide additional amperage when charging; the combined charging capability of both operating together is 230 amps. I have now fabricated a lexan shield between the batteries shown and the tow chargers/inverter to vent hydrogen and heat away from the units. They work well together certainly shorten the time necessary to recharge our house bank of batteries when running the generator.

Oct 20, 2012 – Fabricated and installed a heat/hydrogen shield above battery bank #1

Oct 18 & 19, 2012 – Cleaned and refastened all battery posts with green/red felt and checked water all cells.

Nov 2, 2012 – Removed 110 volt AC unit and reinstalled refinished teak doors in aft companionway.

Nov 9, 2012 – Replaced group 29 (820CCAs) genset start battery with Group 24 deep cycle 800 CCAs battery.

Dec 7, 2012 – Installed new LED flourescent light fixtures in aft end engine room from LEDLIGHTSWORLD.com, 4 watt T5 LED tube light, 12 volt frosted, natural white 4000-4500K, part HK-T5-0303-X

Dec 15, 2012 – Sanded saloon deck to bare wood then 2 coats CPES plus 1 coat Captains varnish 1st day. One coat varnish each day until total 5 coats of Captains gloss; sanded after 2nd coat. Followed by Interlux Goldspar satin. Total: 6 coats Captains and 2 coats Interlux Goldspar after CPES.

Jan 15, 2013 – Installed Ubiquiti WiFi radio from Island Times with our old Linksys WG router flashed with dd-wrt operating system.

Feb 1, 2013 – Installed Hi/Lo LED dome light 6 1/2” warm white fixture in saloon over table. Added 2 Dual USB charger sockets 12 VDC at stereo radio and topside near VHF. Specs: 5V/2.1A from STARMARINEDEPOT.com.

Feb 10, 2013 – Rebuilt anchor chain stopper pedestal with 3 internal SS bolts from bottom and longer SS bolts from top. Fastened to deck and stopper with  3M 4200.

Along the line, the bimini top has been resewn in a few places where the thread in seams was tearing and several zippers were replaced.

Yet to come: AIS transponder with dedicated antenna, engine hot water alarm

Project: Replace fuel level senders

The genesis of this project was the repair of a small leak from the bottom edge of the inspection port plate in the port fuel tank. After the plate (with it’s fuel sender) was removed, the project expanded to replace the fuel level senders for both tanks which hadn’t been working for several years. The same process was employed on both the starboard and port tanks; the photos and descriptions provided here concern only the port tank (the starboard tank plate had no leak, but its fuel sender was not working).

On our DeFever 41 built in 1987, the fuel level sender for both diesel tanks (200 gallons each) is located on what amounts to an inspection port plate, located on the forward end of each tank, near the top of the tank. The plate is secured to the tank with 12 studs welded to the tank which project through the plate; separating the plate and the tank is a gasket. The fuel sender is mounted in the center of the plate on it’s own smaller round attachment plate and mounting bracket (inside the tank).

Photo 1-Port tank showing inspection port plate and sender plate

Photo #1 is of the port tank, forward end, after the retaining nuts have been removed and the sender mount loosened. The electrical lines connecting the sender unit to the gauge have also been removed.

The gray fitting in the upper left corner is the fitting for the genset fuel return line (which has been removed for access).

Access to the job-site required cutting a hole in the side of the engine room bulkhead that separated the fuel tank from the engine room because a hot water heater was placed forward of the fuel tank and would have been difficult to remove. Cutting the access hole was relatively easy using a multi-tool with a circular blade.

The plate was difficult to remove because of the limited area available forward of the tank (about 8”) between the tank and the water heater. The fuel sender plate needed to be loosened in order to permit it to be withdrawn from the tank with the inspection port plate. At the time, we weren’t sure about the structures on the inside of the tank other then that the sender unit was in there, somewhere.

Once the inspection plate and sender apparatus were removed the mechanical structure was obvious: the gauge fastened to an L-shaped bracket which in turn was welded to the circular attachment plate. The positive current from the gauge entered the sender through a circuit that penetrated the attachment plate and was isolated from the surrounding plate, then traveled to the sender via a wire; the sender was grounded to the bracket and the attachment plate and a spade connector (outside the tank) where the ground wire was attached.

Photo #2 shows the entire interior-of-the-tank assembly (except for the flotation ball which is located at the end of the small rod extending to the right edge of the photo.

I had placed zip-tie fasteners along the red electrical line and added some hot glue to the point where the red line attached to an insulated thru-plate terminal thinking that everything could be reused if there was a simple way to fix the sender unit (the black box-like structure at the end of the bracket).

It soon became apparent that the sender unit was beyond repair and that the unit would need replacing.

Photo 3-Sender parts, bracket, fastening plate, and inspection port plate

Photo #3 shows all the parts involved. Clockwise: sender attachment plate (seen still attached to the bracket), the bracket, the sender unit housing (which slides on the long arm of the bracket), the sender unit itself, the outside cover of the sender, the sender attachment plate gasket and inside fastening plate (threaded holes to accept bolts from the outside of the inspection plate).

The inside of the inspection port plate is shown. The lighter area is the surface covered by the gasket and the tank; the dark area is roughly the surface exposed to diesel in the tank.

Photo 4-Inside the sender showing the coil and wiper arm

Photo #4 shows the inside of the sender unit, with the rheostat coil in the left image and the wiper arm shown in the right image. The coil had been damaged through wear and there was no way to repair it; replacement was the only alternative.

Photo 5-Sender attachment plate exterior showing positive and ground connectors. Showing faintly on the plate are “VDO” and “Australia”

This original sender attachment plate shown in photo #5 was not designed to be disassembled. The positive spade terminal imbedded in the plastic-like material required that the attached wire leading to the sender unit be soldered in place on a very short stud protruding on the inside face of the plate.

The search began for a new sender unit and a VDO unit was located that appeared to be an almost exact replacement – the almost part of the description had to do with whether it cold be adapted to the 90 degree bracket arm required to place the sender in the proper position and orientation in the tank.

Once the new sender arrived, it was obvious that the only modification needed was to cut the straight bracket arm and weld it back in place in a 90 degree orientation – creating the original L-bracket. The attachment holes fit the holes in the inspection port plate exactly!

The problem finding a sender for Sanderling’s tanks was that the new sender units were intended to fit into the tank from the top and have a vertical orientation. Since Sanderling’s tanks are virtually inaccessible from the top and the original senders were fastened through the end of the tanks, the sender brackets had to be reoriented (cut and welded) to provide a L-shaped bracket, similar to the original. The original bracket wasn’t used because I was concerned about the condition of the pass-through electrical connection and the need to provide a better soldered connection from the back-side of the pass-through to the wire running to the sender. There was no way to provide a heat sink to protect the plastic-like material which insulated the pass-through from the surrounding plate while soldering the connection.

Photo 6-New sender bracket, sender unit with float and various other parts. New sender attachment plate is laying on the inspection port plate showing the holes aligned

Photo #6 shows the original L-shaped bracket still attached to the attachment plate along with the original gasket and metal backing plate. The new parts are at the top of the photo with the round sender attachment plate laying on the inspection port plate with the holes aligned. The bracket at the top was the one which was cut and then welded at 90 degrees.

The bracket was removed from the round attachment plate in order to cut and weld it without damaging the plastic material which insulates the positive feed to the sender as it penetrates the plate. The new sender attachment plate and bracket were designed to be disassembled.


Photo 7-All parts assembled and ready to place in tank

In Photo #7 everything is assembled and ready to be placed back into the tank. The float rod is shown extending from the mid-right upward and to the left.

The bracket arm to which the sender unit is attached was adjusted to place the sender about midway between the top and bottom of the tank. The float extends outward into the tank and will clear the forward-most baffle in the tank. The short end of the arm has been trimmed by about 2 inches and a “hook” bent into it to prevent it from falling out of the pivot pin should the retaining screw loosen.

The gasket which is placed between the inspection port plate and the tank wall was cut to fit the outline of the plate, the center rectangle removed leaving about 1/2” extra to extend into the tank, and the stud holes punched with a sharp hole punch. These studs and holes were 3/8” in diameter and the holes were punched to be 5/16” in diameter for a snug fit.

To replace the plate, the gasket was fitted over the studs, then the assembly was carefully fed through the rectangular hole in the tank. On the port tank the sender attachment plate had to be loosened (again, to work it into the tank through the 8” space available between the tank and the hot water heater) and then tightened once the plate was in place. That maneuver was not necessary on the starboard tank because there was full access to the inspection port. Once in place, the electrical lines from the gauge were fastened to the screw terminals and the genset fuel return line reconnected.

List of materials (for each tank):

VDO fuel sender unit- Source: Egauges.com – Part # 226-001 – Fuel Sender – 10-180 Ohms – $25.95
(http://egauges.com/vdo_send.asp?Sender=10_180ohms)

Gasket – Source: Grainger.com – Item no: 1XYG7 – Rubber, Buna-N, 3/16 In Thick, 12 x 12 In – $9.24 (Rubber Sheet, Oil Resistant, Commercial Grade, Buna-N/Nitrile Rubber, Thickness 3/16 In, Width 12 In, Length 12 In, Black, Smooth Finish, Non-Adhesive Backing Type, Min. Temp. Rating -30 F, Max Temp. 220 F, Durometer 50A, Elongation 300%, Tensile Strength 1000 PSI, Standards ASTM D2000 BF)

Time involved (not counting the time spent finding the materials, trip to the welding shop and contemplating options): 2 hours per tank.

Project: TCV replacement on Force 10 water heater

TCV Replacement on Force 10 Hot Water Heater

 The cooling system on our Ford-Lehman 135 began losing coolant at a very slow rate about a year ago, and try as I might I couldn’t locate the source of the leak. I added a adapter and short section of new hose to the line going to the overflow tank in order to provide the correct size of hose at the fitting at each end, I changed out the exhaust riser, and was contemplating a new head gasket as the amount lost every run kept slowly increasing. By the time we were well along the Rideau Canal in Canada this past summer when I was adding about a cup of antifreeze/water mix every six hours’ run, something had to be done. I received several glowing recommendations for a boat yard in Mechanicsville, Ontario, and made arrangements to have their mechanic look into the problem.

 The boat yard mechanic and I found the problem in about 20 minutes: the Temperature Control Valve (TCV) on Sanderling’s Force 10 water heater had failed after only four years and needed replacement, leaking a stream of coolant while the engine was running and coolant was circulating to the heater! Since Force 10 is a Canadian company, the yard called the local Force 10 agent in Ottawa only to be told that replacement valves were no longer made because there were so many failures; they offered no alternative. The same information was obtained from the main office in British Columbia. The only solution was to bypass the valve and we could be on our way – just be very careful when opening a hot water tap after a day underway because the water would be extremely hot and could cause burns!

 Photo 1 shows the plumbing to and from the water heater after bypassing the TCV. The TCV itself is labeled as such. The looped black hose on the right side of the valve had been rerouted and the incoming coolant line plumbed directly into the heater.

 Upon completing our cruise in mid-October I started looking into another way of tempering the extremely hot water in the heater that can result from long runs. Force 10 recommended installing a Watts brand (there are other brands available) tempering valve which adds cold water to the hot water exiting the heater based on an adjustable control valve. I found it online in both threaded and unthreaded versions, each version with temperature ranges from 100F-130F, and 120F-160F, in 3/4” and 1/2” sizes. A plumber friend suggested that the 100F-130F unit was best for domestic hot water, so that is what I purchased. You can see the assortment here: http://tinyurl.com/8xsl3np at one of the suppliers.

 The most fun was yet to come, however. Fitting the valve and the lines proved to be a challenge. The manufacturer recommends that the valve be placed at least 8” from the hot water tank, and there were existing water lines that I didn’t want to move unless absolutely necessary. After drawing it all out with the required distance, ball valves that I wanted in order to facilitate future repairs (if necessary) and ensuring that it would go together and come apart without having to move the water heater itself, I went to work with the initial supplies of brass fittings from a hardware store. Three trips later, it all went together nicely and no modifications of existing water lines were required. I wasn’t able to install two additional ball valves due to space/distance limitations.

Photos 2 and 3 show the new valve in place with the convoluted brass plumbing.

 Anyone with a Force 10 Water Heater should inspect the unit to determine if a TCV is in place; it was an optional add-on that was best left off due to the design defect. If it is used, you should be prepared to replace the TCV with a different valve, or at the very least be prepared to reroute the incoming coolant line and bypass the TCV when the valve fails.

Project: Repair broken handrail gate latch

Repairing Broken Handrail Gate Latch

Sanderling is a Defever 41 built in 1987 with lots of teak – window frames, hand rails (with three gates), cap rail, topside trim and seats, and deck. We’re willing to put in the extra work that is required to enjoy the warm appearance of the teak. Our former trawler had the same type of bright-work and we knew how to deal with it. One thing we hadn’t dealt with before was a broken gate latch.

Sanderling’s three gate latches consist of two similar stainless steel parts: one with a sliding pin fixed to the gate, and the other, with an L-shaped piece with a hole which the sliding pin engages, attached to the stationary hand rail. The “broken” gate latch prevented the swinging end of the gate on the starboard side from fastening securely. This is our most used gate since we always try to saddle up to a dock on the starboard side due to left-hand engine rotation. I considered it a safety hazard, particularly when underway, since a slight amount of upward force on the gate would cause it to open. When the gate latch “broke” part way through this past summer’s cruise, I didn’t want to take a chance that dismantling the latch might result in loss of the gate completely, so I didn’t attempt repairs until we reached our home marina this fall. We just had to be extremely careful when traversing the side decks near the broken gate.

The first photo shows how the gate latch parts (the stationary part on the rail and the part on the gate itself) go together as the gate closes. The photo also shows the location of the shim that is inserted between the tang on the latch and the gate, and the L-shaped piece with the hole that engages the pin and holds the gate securely. This type of latching mechanism seems to be common on trawlers with teak hand rails.

The latch slides over the end of the gate and is fastened with five screws from the bottom. The first concern was whether removal of the hardware would require the use of heat and as a consequence damage the underlying teak. Once I removed the screws and started gently tapping the edge above the teak rail with a small hammer and large flat-blade screw driver, the latch moved slowly with each tap, but was obviously fit quite snugly on the rail. Fortunately, no heat was required even though there may have been some caulk or adhesive used when it was originally put in place. There was also the need to hold the gate as firmly as possible so as not to damage the hinge part of the gate mechanism, and to hang onto the latch so as not to have it fall overboard if it suddenly came loose and jumped out of my hand!

Once it was successfully removed, the problem became apparent. The small 4-sided box that holds the movable pin and spring assembly had come unfastened from the main frame of the latch.

The second photo shows the box with spring and pin (turned upside down from it’s normal position) and the apparent single-weld attachment point with the corresponding attachment point visible inside the stainless latch frame. The beveled end of the pin engages the hole in the corresponding fixed latch, while the upright portion of the pin extends below the latch and is moved back with a finger to disengage the pin from the hole. The spring holds the pin in it’s closed position.

The third photo shows the end of the gate with the latch removed. You can see the hollow area where the spring box is located and how the teak has been slightly reduced to accommodate the thickness of the latch frame.

It seemed that a tack weld on either side of the spring box would be the ideal solution, but I couldn’t find any shop that would do the two tack welds for a reasonable price. Consequently, I used a “puddle” of JB Weld to fasten the spring box to the frame after smoothing out the two mating surfaces and removing the remnants of the original tack.

The fourth photo shows the latch back together with a bit of JB Weld showing around the edges of the spring box.

Hopefully, JB Weld will hold the two parts together; if not, I’ll write another article about how to get the parts welded together.


Back at "Home" marina – October 15, 2011

Here is a link to a spreadsheet in XLS format which has many of the details of our cruise. This was brought up-to-date after we arrived home. It contains all the locations where we stopped, mileage between stops, hours underway, etc. It may be helpful to anyone planning a cruise along the waters we traveled. 2011 Cruise spreadsheet-final

We arrived home on Saturday, October 15, 2011. We were delayed for four days at Savannah due to high winds and rain, then made good time after departing the Isle of Hope Marina on Tuesday, October 11th.

Here’s the itinerary since arriving in Oriental, North Carolina, on September 30th.

We stayed in Oriental, ICW mile180.8, an extra day until October 2nd, 2011, waiting for higher-than-comfortable wind to lay down on Bogue Sound which runs about 25 miles from Beaufort/Morehead City to Swansboro. After departing on October 2nd we stopped for fuel at Jarretts Bay Boat Works on the way to Morehead City, then continued on through Bogue Sound (the wind was decent) to Mile Hammock Bay at Camp Lejeune, North Carolina, where we anchored for the night.

The next day we were underway by 0650 and after almost 10 hours underway (45 minutes or so waiting for various bridges to open) we had gone down Cape Fear River and were tied to the free dock at the Provision Company at Southport, North Carolina. Remind us never to stop there again – the food is very poor – we can’t figure out why anyone comes from any distance to eat there!

On October 4th we departed at 0710 and anchored for the night in the Wacama River anchorage at ICW mile 375, just off the Wacama River.

Over the next several daysWe stopped for the night at Graham Creek (north of Charleston) at mile 439, then at the Seabrook anchorage at Fenwick Island at mile 512, and on the night of October 7th at the Isle of Hope Marina just east of Savannah, Georgia, at mile 584. Druing the day on the 7th we read repeated weather forecasts, all predicting stormy weather for the next several days and boats were discussing what they were going to do while the storm passed. Since we had stopped at the marina in order to get fuel and spend the night, we arranged to stay several more days while the storm passed. By the end of the next day (October 8th) the marina was totally full and had boats tied to the fuel dock (a spot normally kept open for boats needing to get fuel). For the next three days we had high winds and torrential rain (one boat clocked some gusts at 55 mph).

By October 10th the wind and rain had subsided, and the forecast was decent for the next day, so on Tuesday, the 11th of October we departed at 0920 (had to wait for the tidal current to subside a bit) and started laying tracks to get home as soon as we could. We anchored that night in the North River at mile 652, then on October 12th we crossed into Florida and a few hours later anchored at South Amelia River at mile 725.8.

October 13th took us through St. Augustine and then because there are no good anchorages for a number of miles we stopped for the night at the newly opened marina at Marineland. What a nice facility it is! We’ve gone by there by boat and car for a number of years and always wondered why no one had opened a marina in the nicely protected basin just off the ICW. Well, this August someone did, and it is a great, if remote, facility. Just across the road is the dolphin research center which reopened 4-5 years ago after being abandoned for a few years. The Georgia Aquarium is involved in the education center, and kayak tours of the surrounding area are operating out of the marina. Right across route A1A is a series of beautiful beaches. Nice place to stop!

Statistics for the trip at this point:
676hours 15 minutes underway; 3848.5 nautical miles/4422.2 statute miles

We departed Marineland Marina as soon as we could see the surface of the water on October 14th at 0700 and cruised the longest distance we made on any day of our trip: 89.9 statute miles in 12 hours and 30 minutes. We anchored after sunset just south of the NASA Causeway Bridge south of Titusville, Florida, at mile 885.

On Friday, October 15, 2011 we were underway at a leisurely 0810 and at 1210 we were back in our slip at Manatee Cove Marina at Patrick Air Force Base.

Trip: 702H45M     4013.6NM/4611.9SM based on the onboard GPS.
Total engine hours: 730
Fuel consumed (approximately): 1100 gallons

These past six months have been great and the cruise was fantastic.

Oriental, North Carolina – October 1, 2011

September 23, 2011 Baltimore. We met Jennifer for dinner and enjoyed hearing of her experiences teaching in the Baltimore City school system. She’s teaching geometry to 10th & 11th graders through a program that encouraged college grads from other disciplines to enter the teaching profession and provided concentrated training throughout the summer to prepare them for jobs in inner-city schools. She says it is more difficult than being a Division Officer on a Navy ship!

We departed Baltimore at 0655 on September 24th and headed straight down Chesapeake Bay after transiting the Baltimore channel to the Bay Bridge north of Annapolis. We arrived in Solomons and took a mooring at Zahniser’s Marina at 1825, before sunset.

We had contemplated traveling all the way to Hampton, Virginia (just north of Norfolk) in one day so that the next morning Judy could get to a pharmacy to have some photos taken for a visa (more about that later), but it is a long trip and if the tidal current isn’t just right, we’d get there after dark (something we prefer not to do). So we cut the distance in half and made it a two day trip. On the 25th of September (Sunday) we cast off the mooring at 0815 and anchored in Jackson Creek off the Piankatank River at 1705 for a day of 8 hours and 50 minutes. On Monday the 26th we were underway at 0805 and were at the Hampton Public Dock at 1515. Judy immediately went in search of a place that could take some passport-type photos for the visa she needs, but the best she could find was a small drug store where she could print some photos from pictures we had taken earlier. There wasn’t time to get to a post office, so that was delayed for another stop.

One of the reasons we’re hurrying back to Florida is that Judy was given the opportunity to travel to Tanzania, Africa, as part of a team teaching an instructor course for the American Heart Association. She is required to get a visa plus some immunizations prior to her departure on October 22nd, so the visa application had to get sent to the Tanzanian embassy in Washington, DC, as soon as possible, and passport-type photos were required to accompany the application.

HUGE dredge working
on the channel at Norfolk

On Tuesday the 27th we departed Hampton at 0715 heading for the Dismal Swamp Canal. This leg took us past the U.S. Navy base at Norfolk with it’s long rows of every type of warship imaginable, then through the commercial areas with their container ships and loading facilities, through downtown Norfolk and the USS Wisconsin display, and finally through the industrial areas south of Norfolk in the area of Chesapeake, Virginia.

Entering lock at Deep Creek,
Dismal Swamp Canal
Mileage from the lock

After the Gilmerton Bridge we departed the “standard” ICW and headed toward the Dismal Swamp Canal and the “secondary” ICW route into Albermarle Sound. We had only a short wait for the lock at Deep Creek, and after locking through stopped at a small dock for a short time to get a few grocery items and look for a post office where Judy’s visa application could be mailed. The post office was 4-5 miles away, too far to walk, so we continued on through the 22 mile stretch of the canal between locks to South Mills bridge where we missed the 1600 opening by 15 minutes. We tied up to the bridge’s approach wall for the night, and found a post office about two blocks away where Judy placed her visa application in the outgoing mail drop!

Waiting from bridge at South Mills
South Mills Lock entry into
the Pasquotank River

The next morning (Wednesday, Sept 28th) we went through the South Mills bridge and lock and were in the Pasquotank River heading for Elizabeth City and Albermarle Sound by 0905. The river current was favorable all the way past Elizabeth City (about 20 miles from the South Mills Lock) and into Albermarle Sound. Weather was good with light wind from the south, so we continued through the sound and into the Alligator River. Shortly after passing through the Alligator River bridge, about 4 miles from the mouth of the river, the wind speed started to increase slightly, the waves started showing a few white-caps, and clouds started building in the west. After checking several weather sources and radar images online it was apparent that we were in for some thunderstorms and heavy rain, and NOAA started broadcasting severe weather alerts for the area to the north of us. As we approached the part of the river that turns west, the rain started and we decided we would not turn to the west and head toward some of the storms, but would find a place to anchor on the western shore which would provide some protection from the westerly winds and the rain which began to rapidly increase. Judy prepared the anchor to deploy without her assistance and we closed up the topside steering area to provide protection from the wind and rain. We used the GPS and radar to guide us into a good anchorage just south of the ICW, and lowered the anchor with the bow pointing into the wind. We watched the radar and GPS for 30 minutes or so as the wind and rain continued and then gradually subsided. In another half an hour all was quiet and the storms had passed out of the area. We had a quiet dinner and everything was calm for the rest of the night.

Our travel for the next two days (Thursday and Friday) was dictated by Judy’s need to complete a Webinar presented by her Legal Nurse Consulting organization in Orlando (and which she had worked on during the summer).  We originally had planned to travel as far as the Pungo River the next day and anchor near a marina in Bellhaven which had a WiFi that we could pay for so that Judy could be assured of a good internet connection. That would have resulted in one short cruising day on Thursday and staying anchored near the WiFi for the day on Friday.

On Thursday, September 29th, we suddenly realized that we could get as far as Oriental, North Carolina in one long day and find an available WiFi there, so at 0850 we got underway from the Alligator River and arrived in Oriental, anchoring in Smith Creek at 1920 just as twilight faded. The next morning, Friday, we moved two miles to the Oriental Marina which had assured Judy that their WiFi was working well where we spent the remainder of the day and Judy completed the Webinar. As we were eating dinner that evening at the restaurant associated with the marina we became aware of a major change in the weather forecast which was for wind up to 25 mph from the northwest the following day for the area west of Beaufort, North Carolina, where we would need to travel. It is a stretch of water without much protection, and any wind in excess of 15 mph can create rough conditions. Temperatures were also forecast to drop into the 60s during the day. Consequently, we decided to stay another day in Oriental and the easiest place to stay was to remain at the Oriental Marina. We have walked to the only grocery store to buy fresh fruit and a few other items and now beef stew is simmering in the crockpot filling the boat with mouth-watering aroma!

Tomorrow the wind is forecast to subside a bit, so we’ll depart Oriental and hope to get to Mile Hammock Bay at Camp LeJeune Marine Corps base past Swansboro, North Carolina. We’ll stop for about 140 gallons of fuel on the way before we get to Beaufort/Morehead City.

Chesapeake Bay – September 23, 2011

Fast and brief. We stayed a night on the south wall at Champlain Canal lock #9 on September 12th, two nights at the yacht basin in Fort Edward (where I changed the engine oil and filters), then another two nights (due to weather) in Mechanicville at the free town dock (with electricity).

We departed Mechanicville on September 17, 2011, and haven’t stopped for more than one night since.

Kingston, New York at the Kingston Municipal Marina on September 17th after exiting the Champlain Canal and passing through the Federal Lock at Troy.

Haverstraw Bay on the night of September 18th.

Great Kills (Staten Island) New York on September 19th where we had dinner with a good friend, Kevin.

Atlantic City, New Jersey, on September 20th where we were lucky enough to get a spot on the dock at Gardner’s Basin after a 13 hour, 86 nautical mile day!

Cape May, New Jersey, at the anchorage, on September 21st.

We refueled on Thursday morning then departed Cape May on September 22nd and made it all the way into the Chesapeake where we anchored for the night in Veasey Cove on the Bohemia River just a few miles from the western end of the Chesapeake and Delaware Canal. Delaware Bay was as peaceful as it gets, and we saw the tall ship Danmark following and then passing us on its way up the bay heading to Philadelphia (we assume).

This morning we departed Veasey Cove and caught a fair tide down the upper Chesapeake to Baltimore where we’re going to have dinner with Jennifer tonight (it’s raining cats and dogs).

Tomorrow we’ll head to Solomons and the next day to Norfolk. The weather is predicted to be good for those two legs – all except the 90% chance of rain both days.