This project came about when I stepped on the top of the line locker (port side, just aft of the upper deck) to clean a spot on the corner of our new Bimini enclosure. My weight caused a cracking sound and I knew the underlying deck structure had broken, although not completely. A few days later I removed the small deck (approximately 18″X26″) and took it home so I would have the room and the tools I needed readily available.
The small deck consists of 2″ strips of teak decking held within a teak “picture” frame. Supporting the structure on the back/underside was a piece of 1/2″ plywood (probably not marine ply based on the amount of deterioration of the plywood due to some water intrusion around an edge) core. It was obvious the plywood core would need to be removed and replaced. After the old backing removed, I determined that I had the perfect materials with which to make a strong, waterproof backing: pieces of 1.5MM marine ply from another deck project, several kinds of fiberglass, and lots of epoxy! The perfect combination.
This is a perfect project for vacuum bagging, as everything is flat and several pieces must be held in place and clamped together while epoxy is curing. This post (with a bunch of photos taken by friend Len and I) will show one method of vacuum bagging that I find extremely easy to use.
The first step was to remove the old plywood backing material which was accomplished with an oscillating multi-function power tool with a circular cutting blade, heavy rasp and sanding attachments. Removal of the core material was the most difficult part of the project and took 3-4 hours. Part of the core was still solid and firmly attached to the teak strips with an adhesive, some of which had deteriorated. The power tool was used to cut off the old core close to the base and around the edges, the rasp cleaned up a very thin layer of old material that remained in place, and the sanding attachment with 80 grit paper finished the job. One of the corners of the frame was coming unattached so it was repaired using thickened epoxy and clamped into position on the bed of a table saw while the epoxy cured.
Once the old cor was removed I was able to determine the thickness of the material needed to replace what I had removed. The depth was approximately 1/2″ thick. Although I had some 1/2″ plywood that I could have used, I wanted to make it stronger and impenetrable to water, so opted to build up several layers instead. I had some heavy bi-axial cloth with a stiched backing at 90 degrees, as well as some lighter-weight standard cloth. The heavy cloth was placed against the teak strips, then the 1.5MM marine ply, the light cloth and another layer of 1.5MM marine ply. I guessed that after bagging they’d create a structure very close to the 1/2″ thickness of the void where the old plywood was removed. The marine ply and pieces of fiberglass cloth were cut in advance so they’d lay-up nicely within the frame; because the piece of marine ply I used was left over from another project, I used two pieces laid end to end to make up each plywood layer.
There are many web sites and books devoted to vacuum bagging. The technique I used for this project is very simple: bag everything to the garage floor using duct tape to seal the edges and a shop vac to pull the vacuum! No special equipment required.
Here’s our show and tell

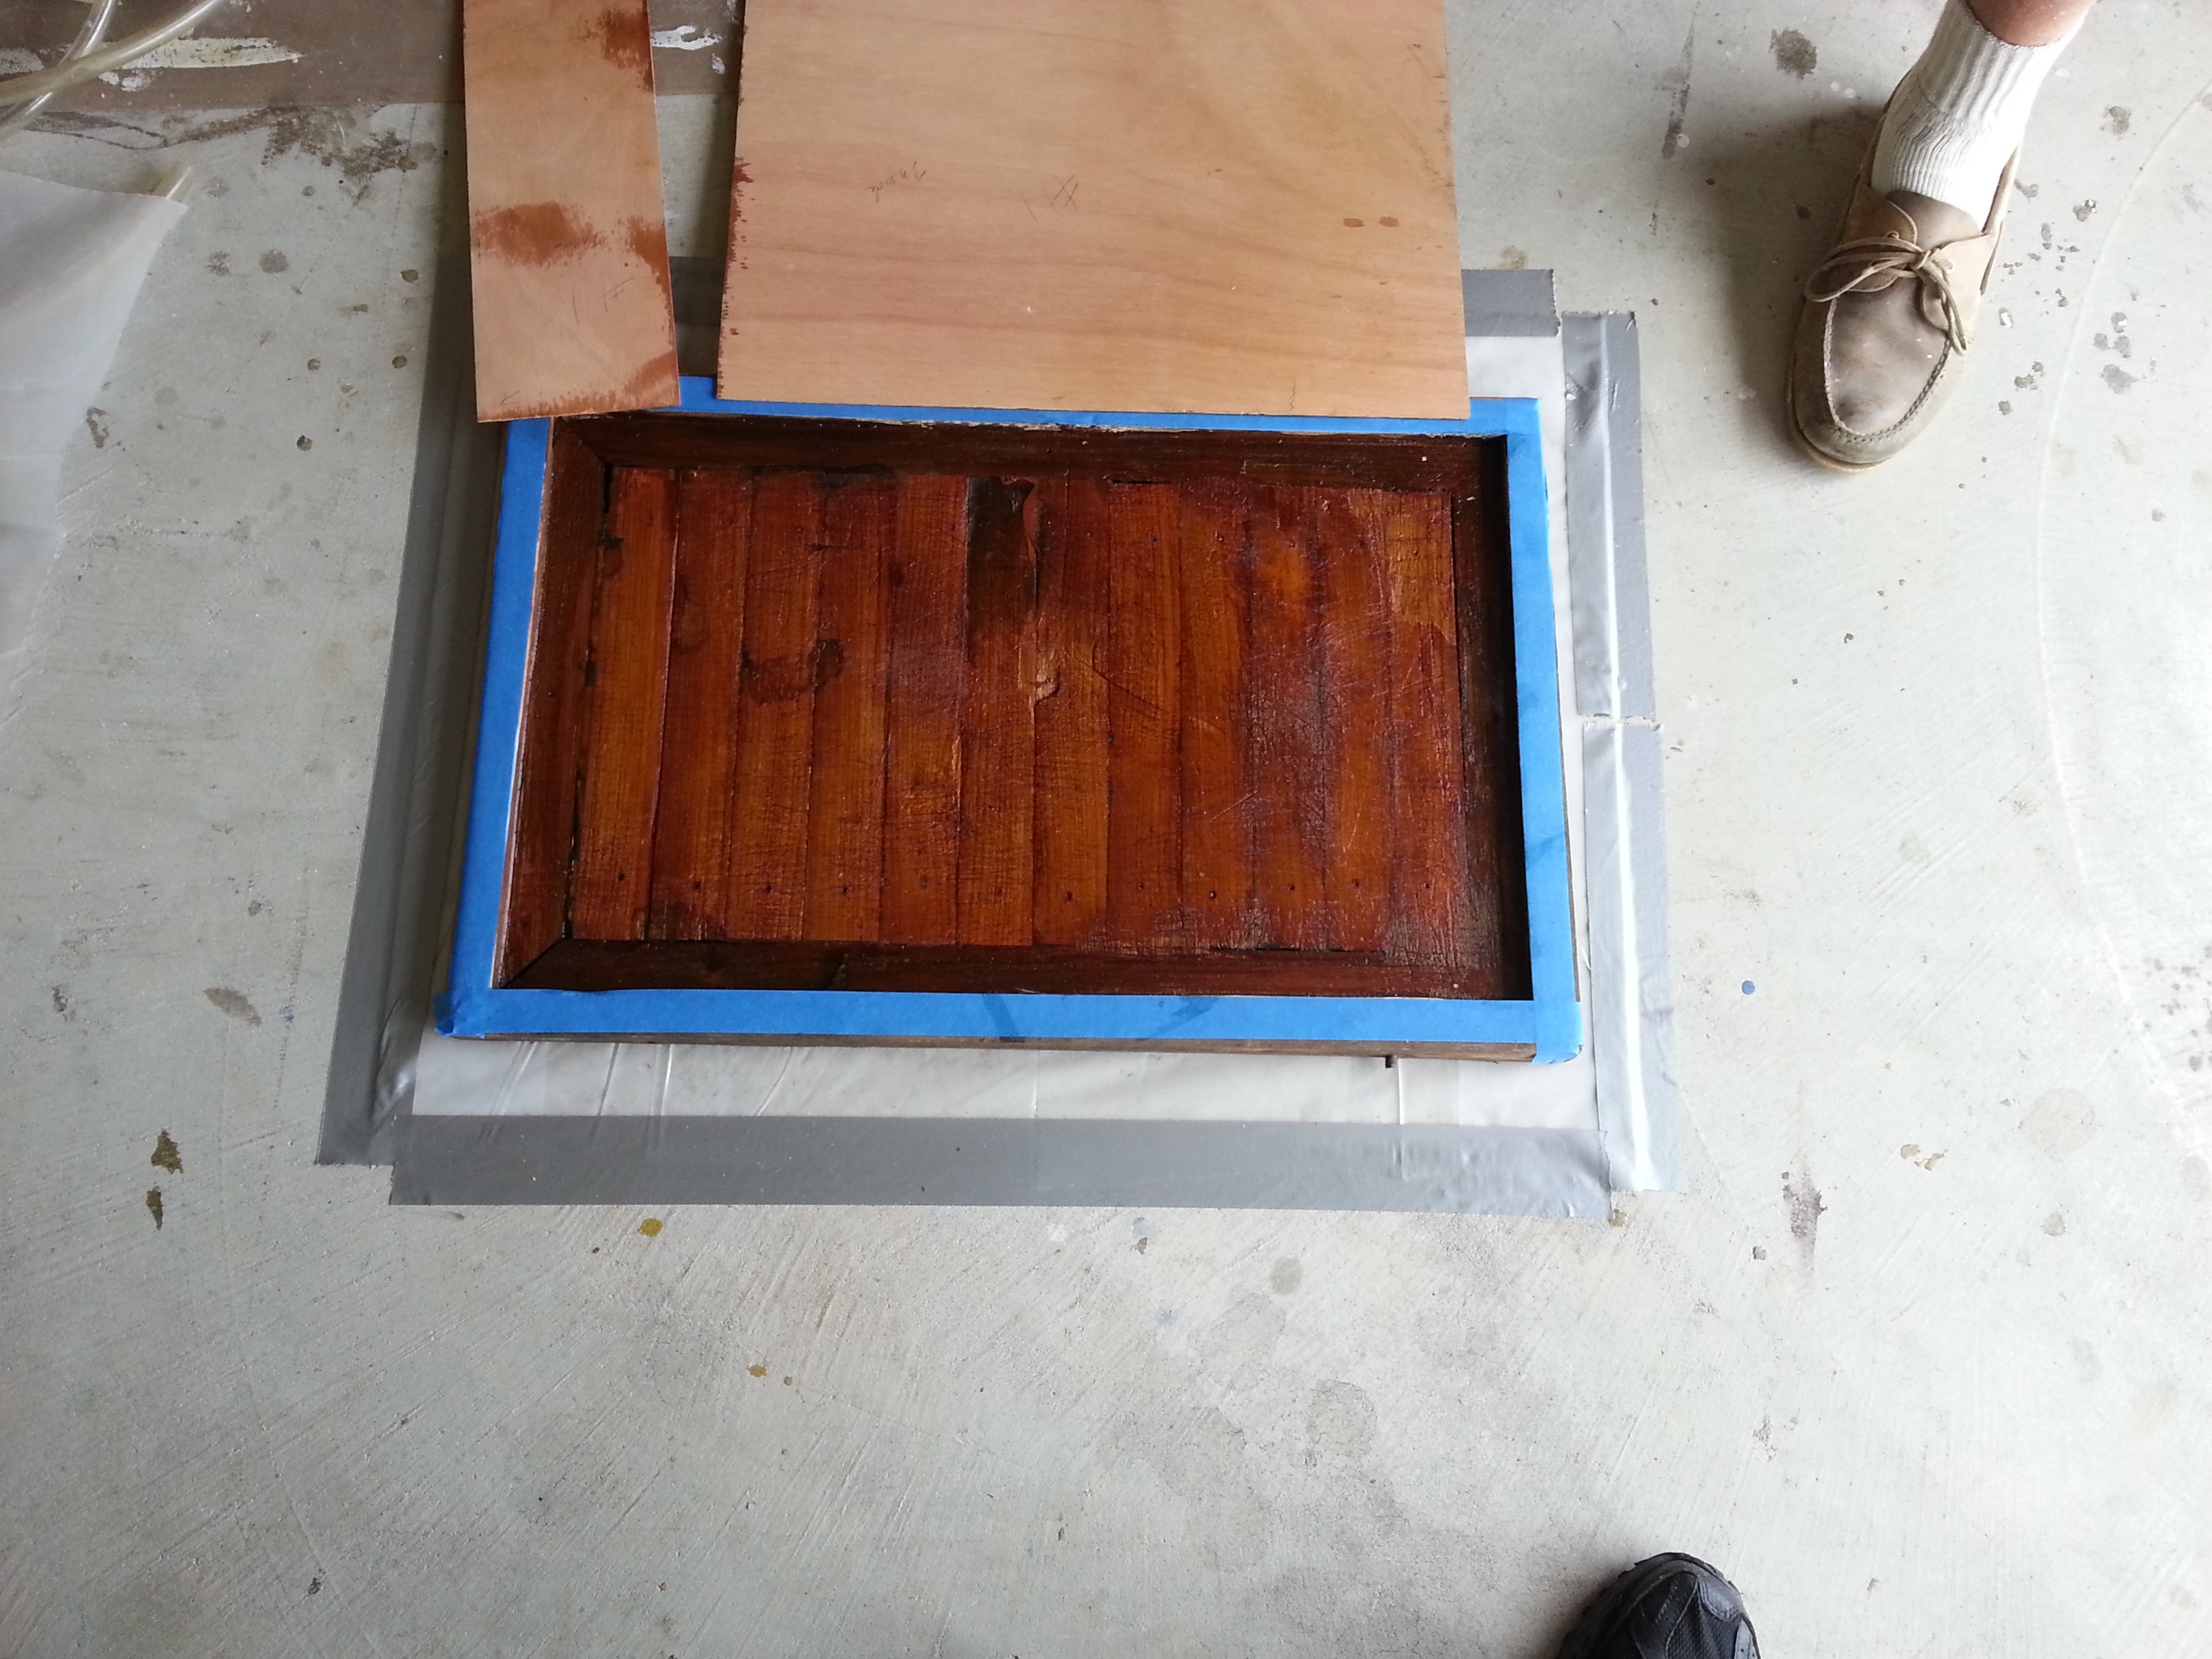
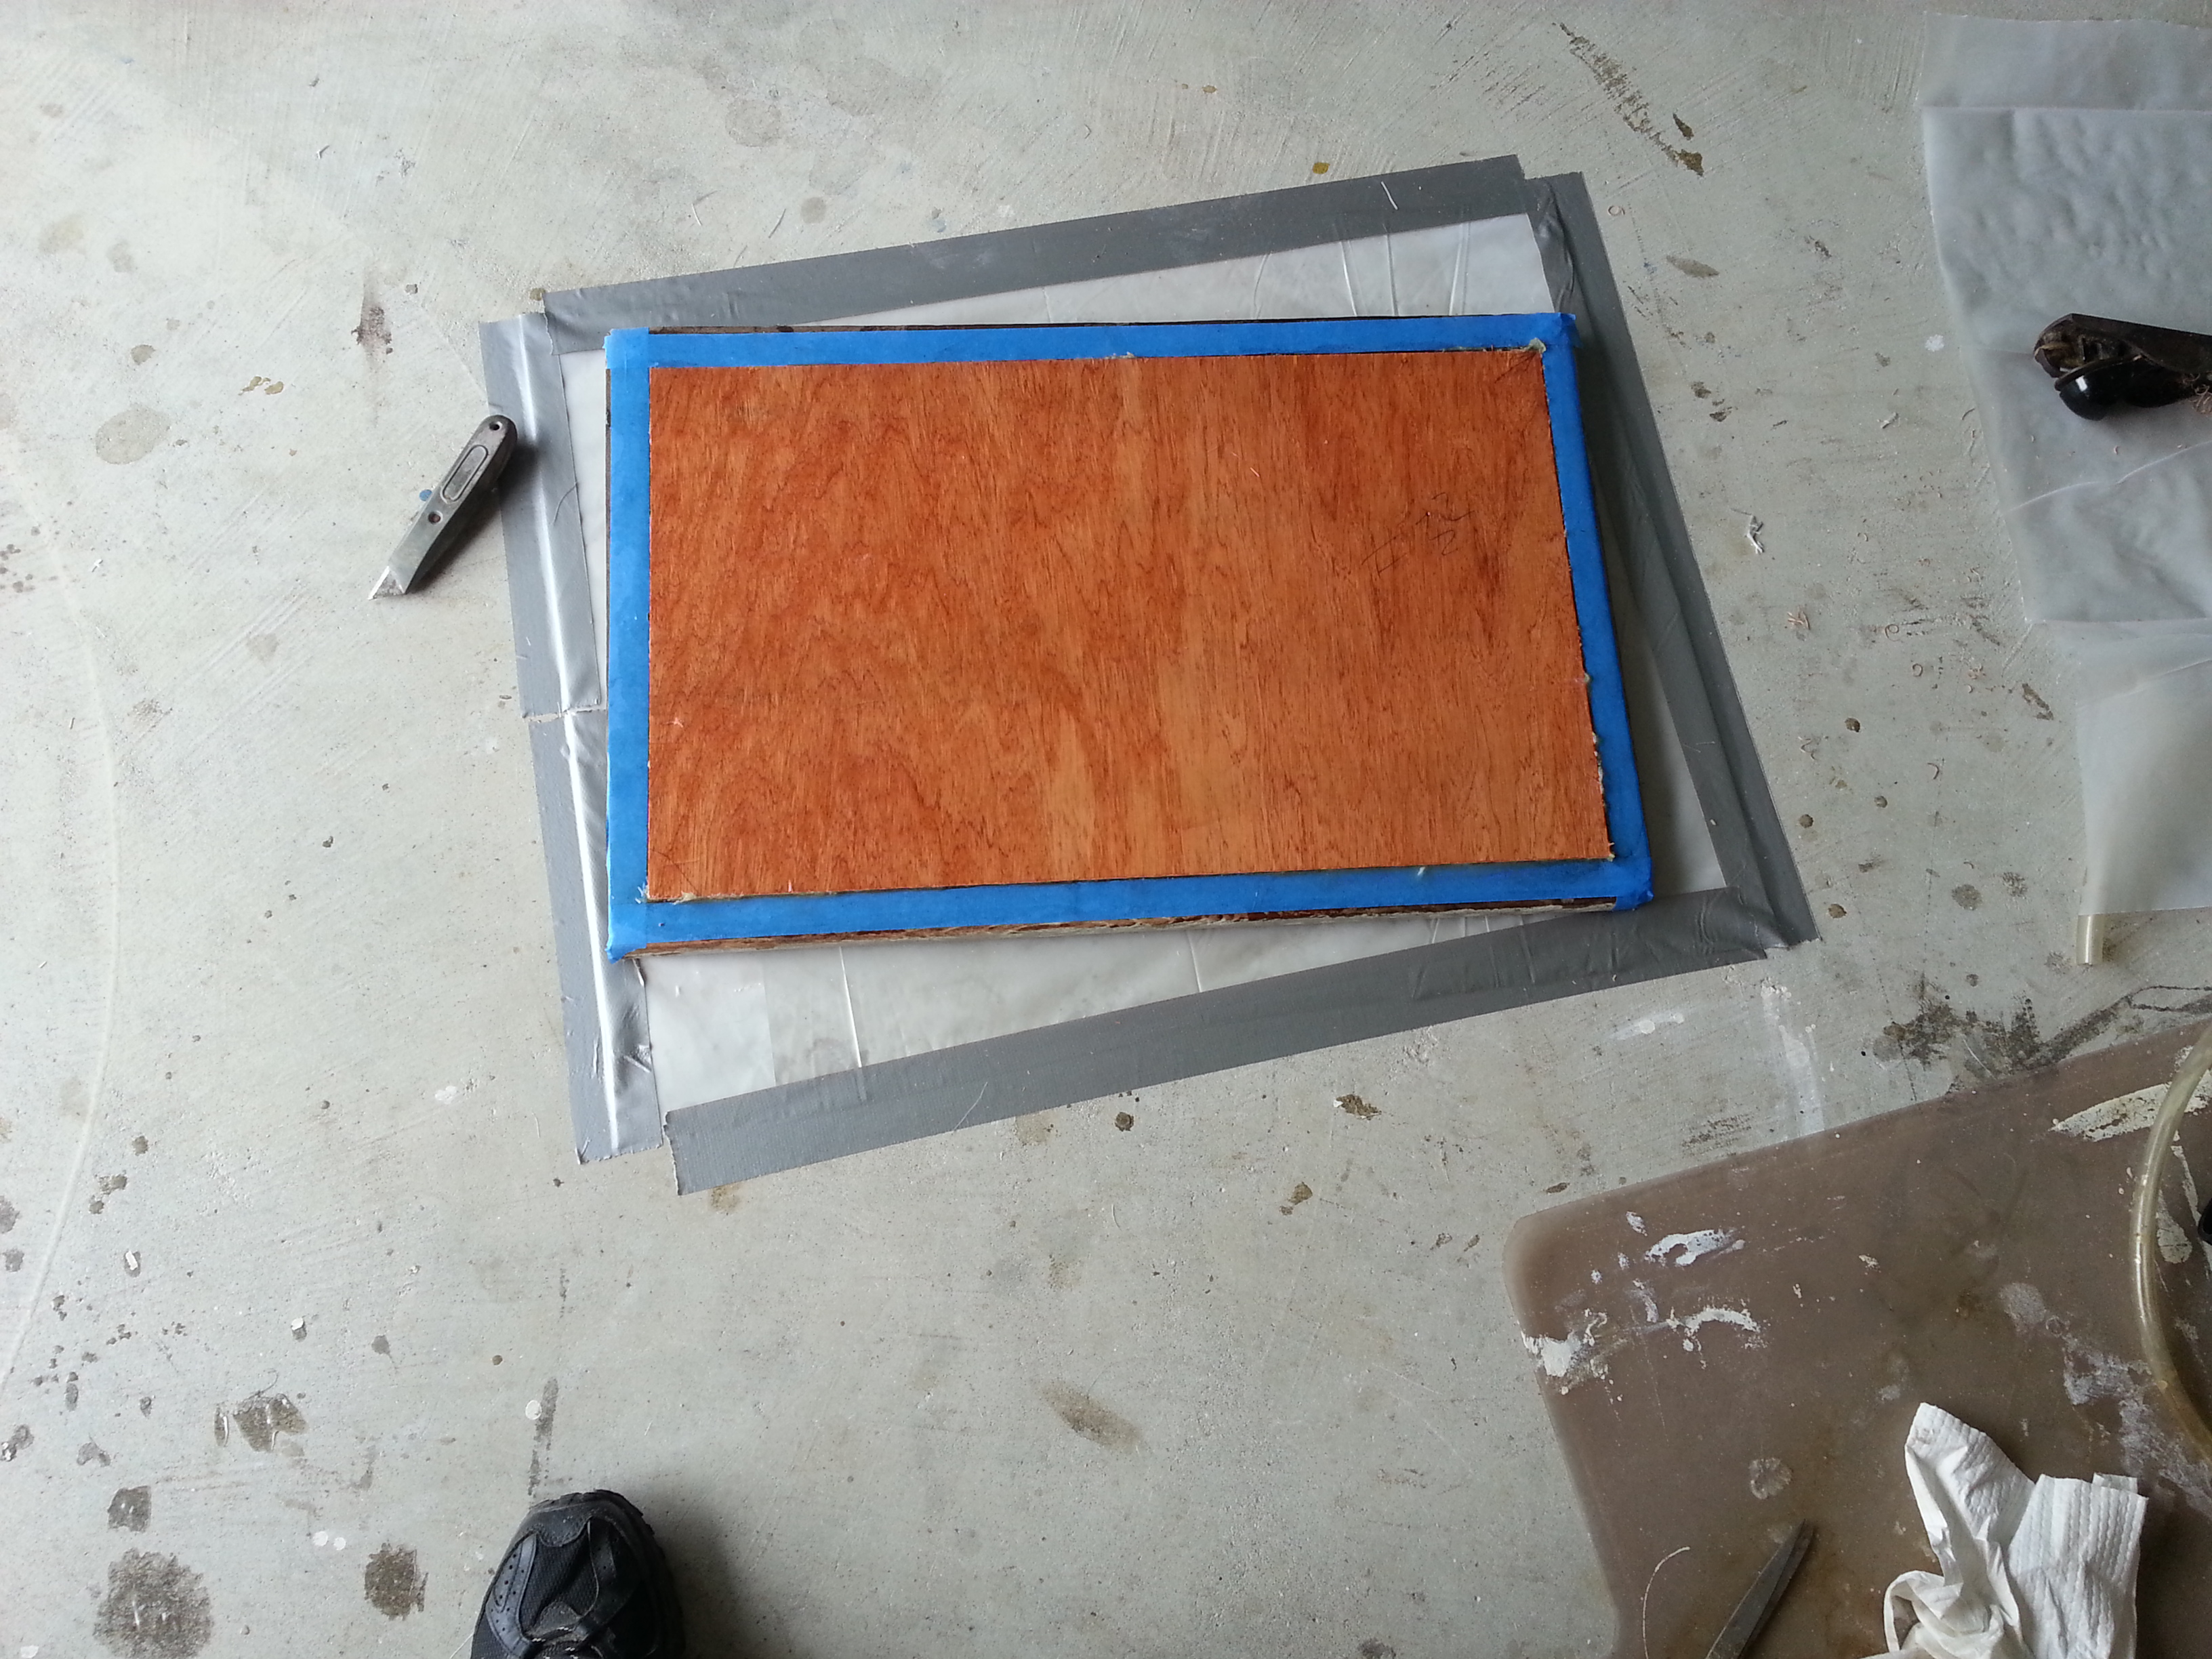
#1 – Bottom layer of plastic taped to garage floor to prevent adherence to floor. Roll of 4 mil plastic in hand, getting ready to cut to fit width of deck panel. Underside of teak deck strips are visible. Blue masking tape applied to edges of frame to facilitate removal of excess epoxy.
#2 – The underside of the deck in the frame coated with epoxy and ready for the layer of thick fiberglass. The first plywood panel is ready to be added at the appropriate time.
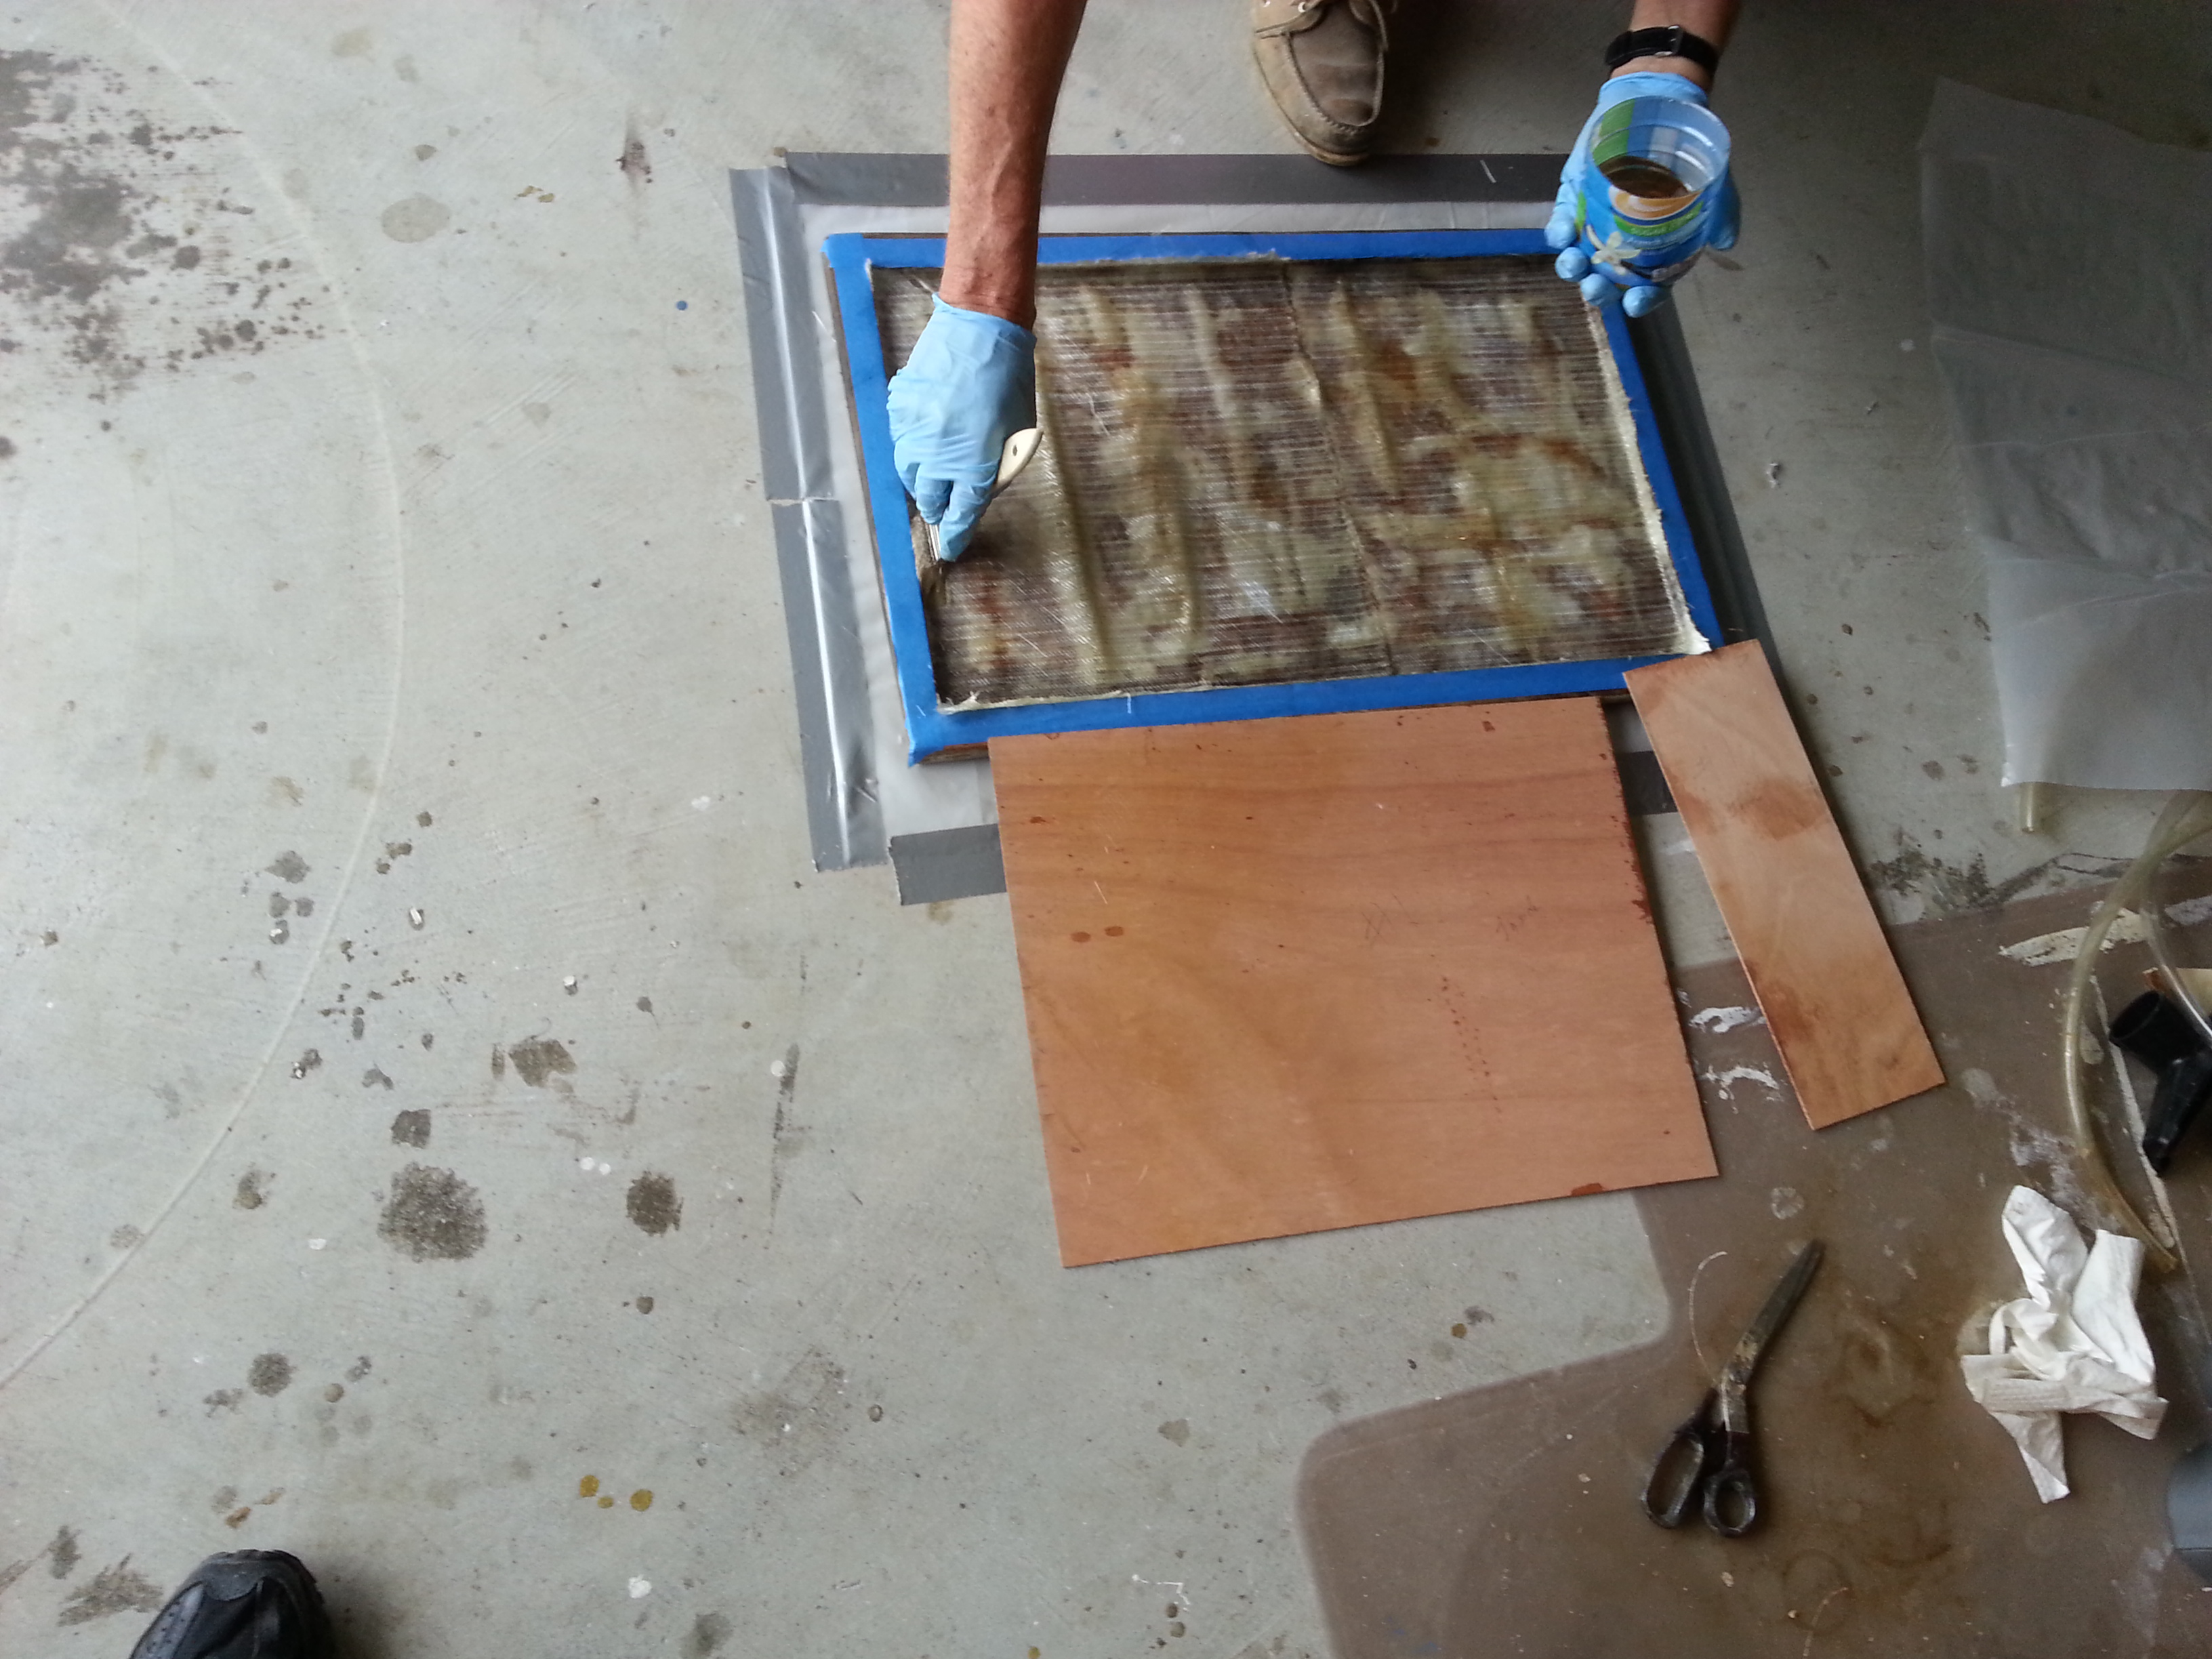
#3 – First original layer of thick fiberglass being wetted-out in the frame. There’s no reason to saturate the glass first as long as you ensure it is thoroughly saturated after putting it in place – it will turn slightly translucent when it is sufficiently “wet.” The first layer of marine ply is ready to put into place.
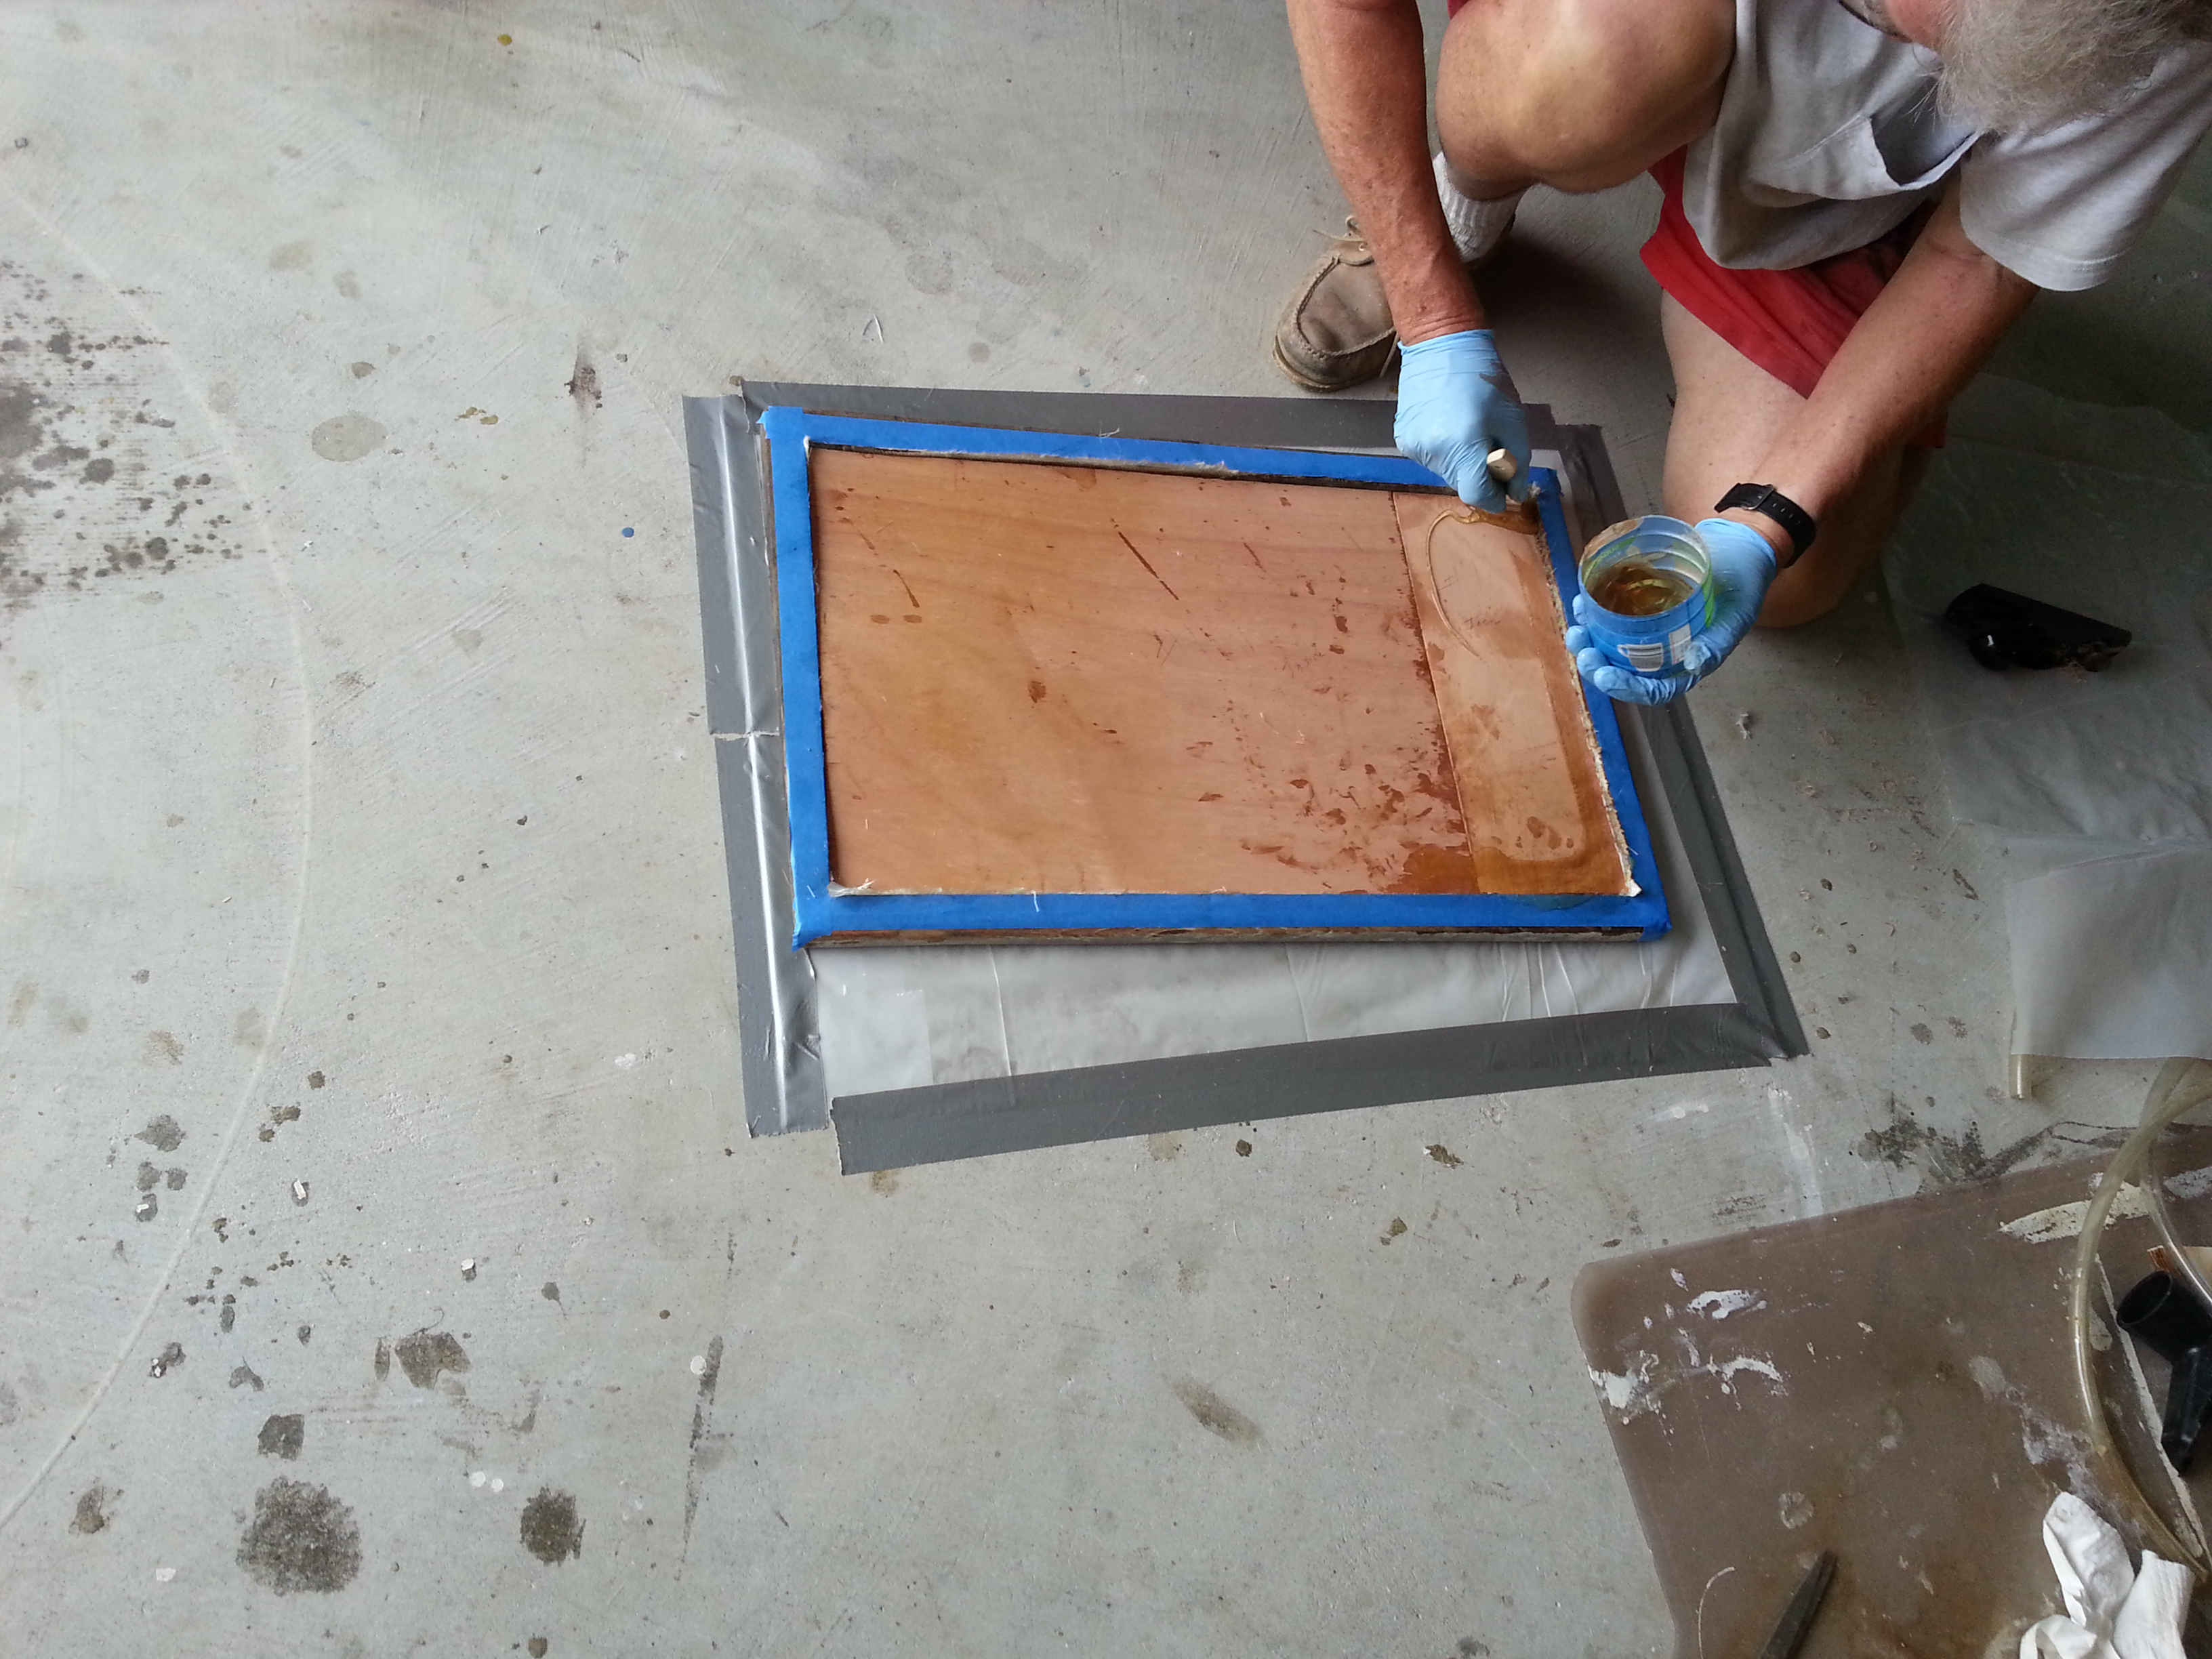
#4 – Deck structure after the first core layer of the heavy fiberglass cloth and the first layer of 1.5mm marine ply. You can see the two pieces used to fit the “frame” area. Then comes a layer of lighter fiberglass cloth and the second (final) layer of 1.5mm teak marine ply (with the panels joined on the opposite end of the frame for improved strength). Slightly thickened epoxy is being applied to the panel of plywood prior to adding the layer of fiberglass.
#5 – Deck structure with all the core layers in place sitting on the plastic sheet taped to the garage floor. Next comes the plastic sheet to cover the the deck, then the header tubes, then the final layer of plastic which will be the top of the “bag.”
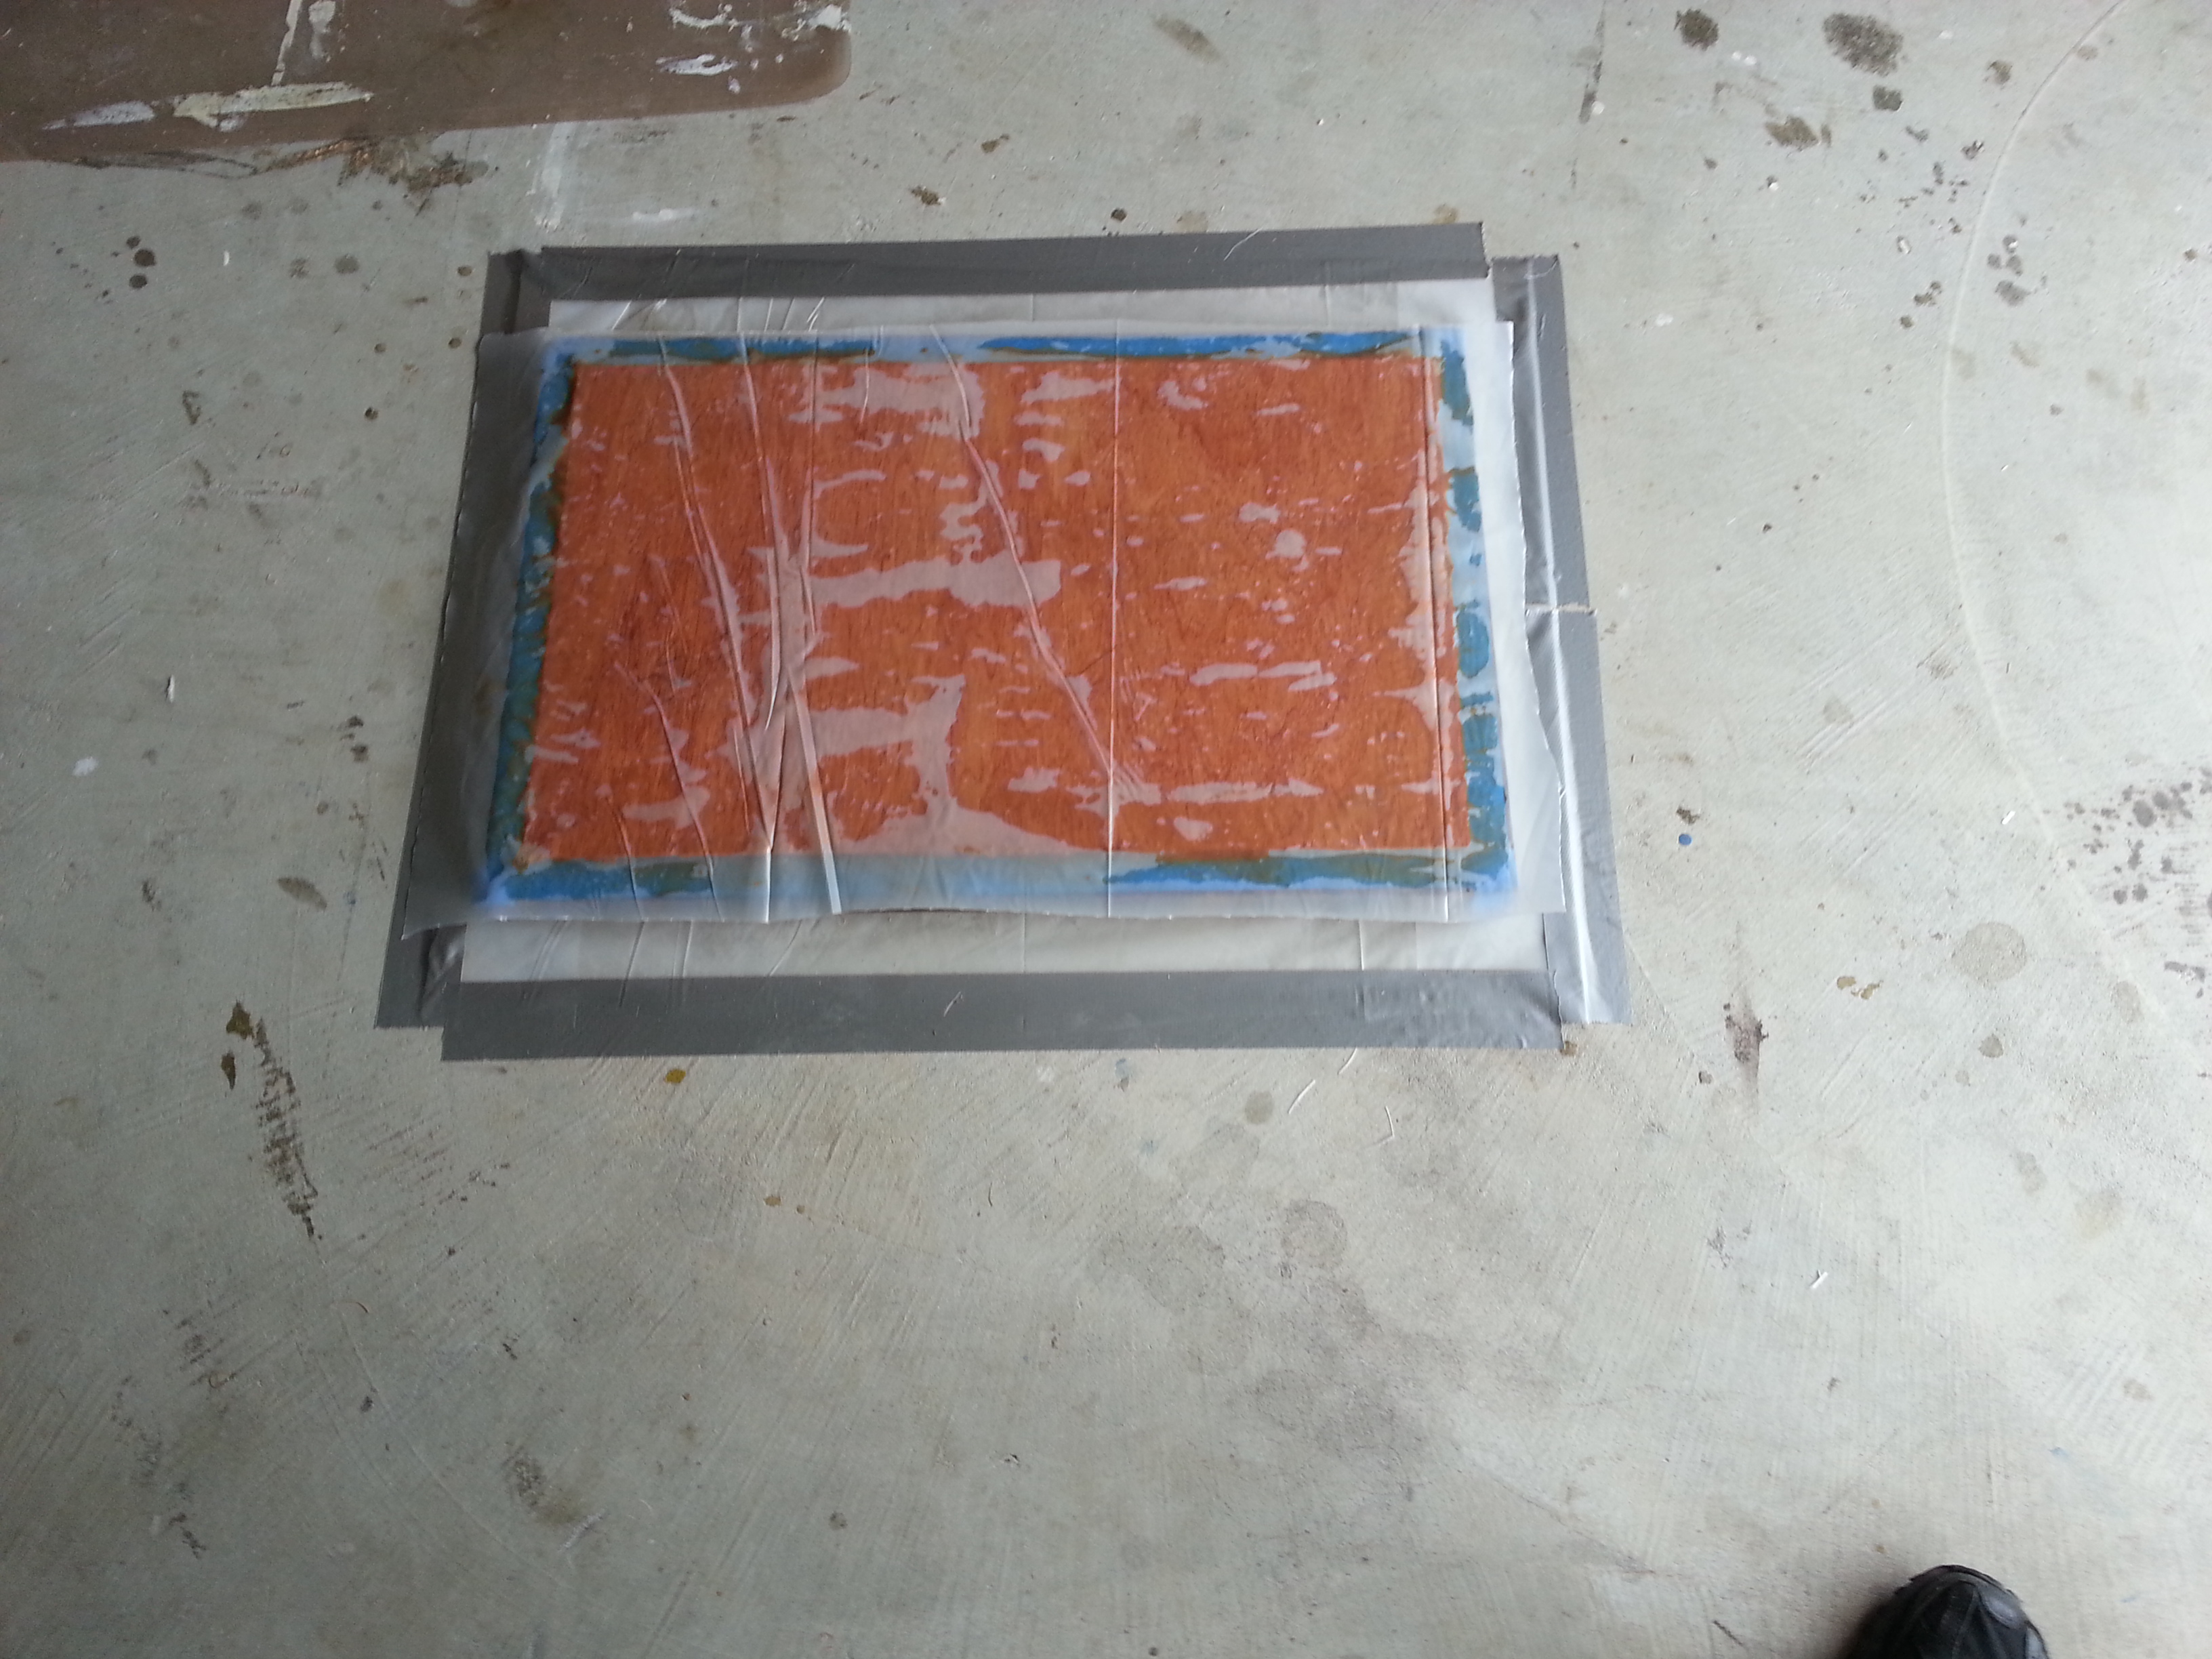
#6 – Deck structure with all core materials in place and epoxied, with 4 mil plastic sheet placed over the deck. Next added will be the header tubes.
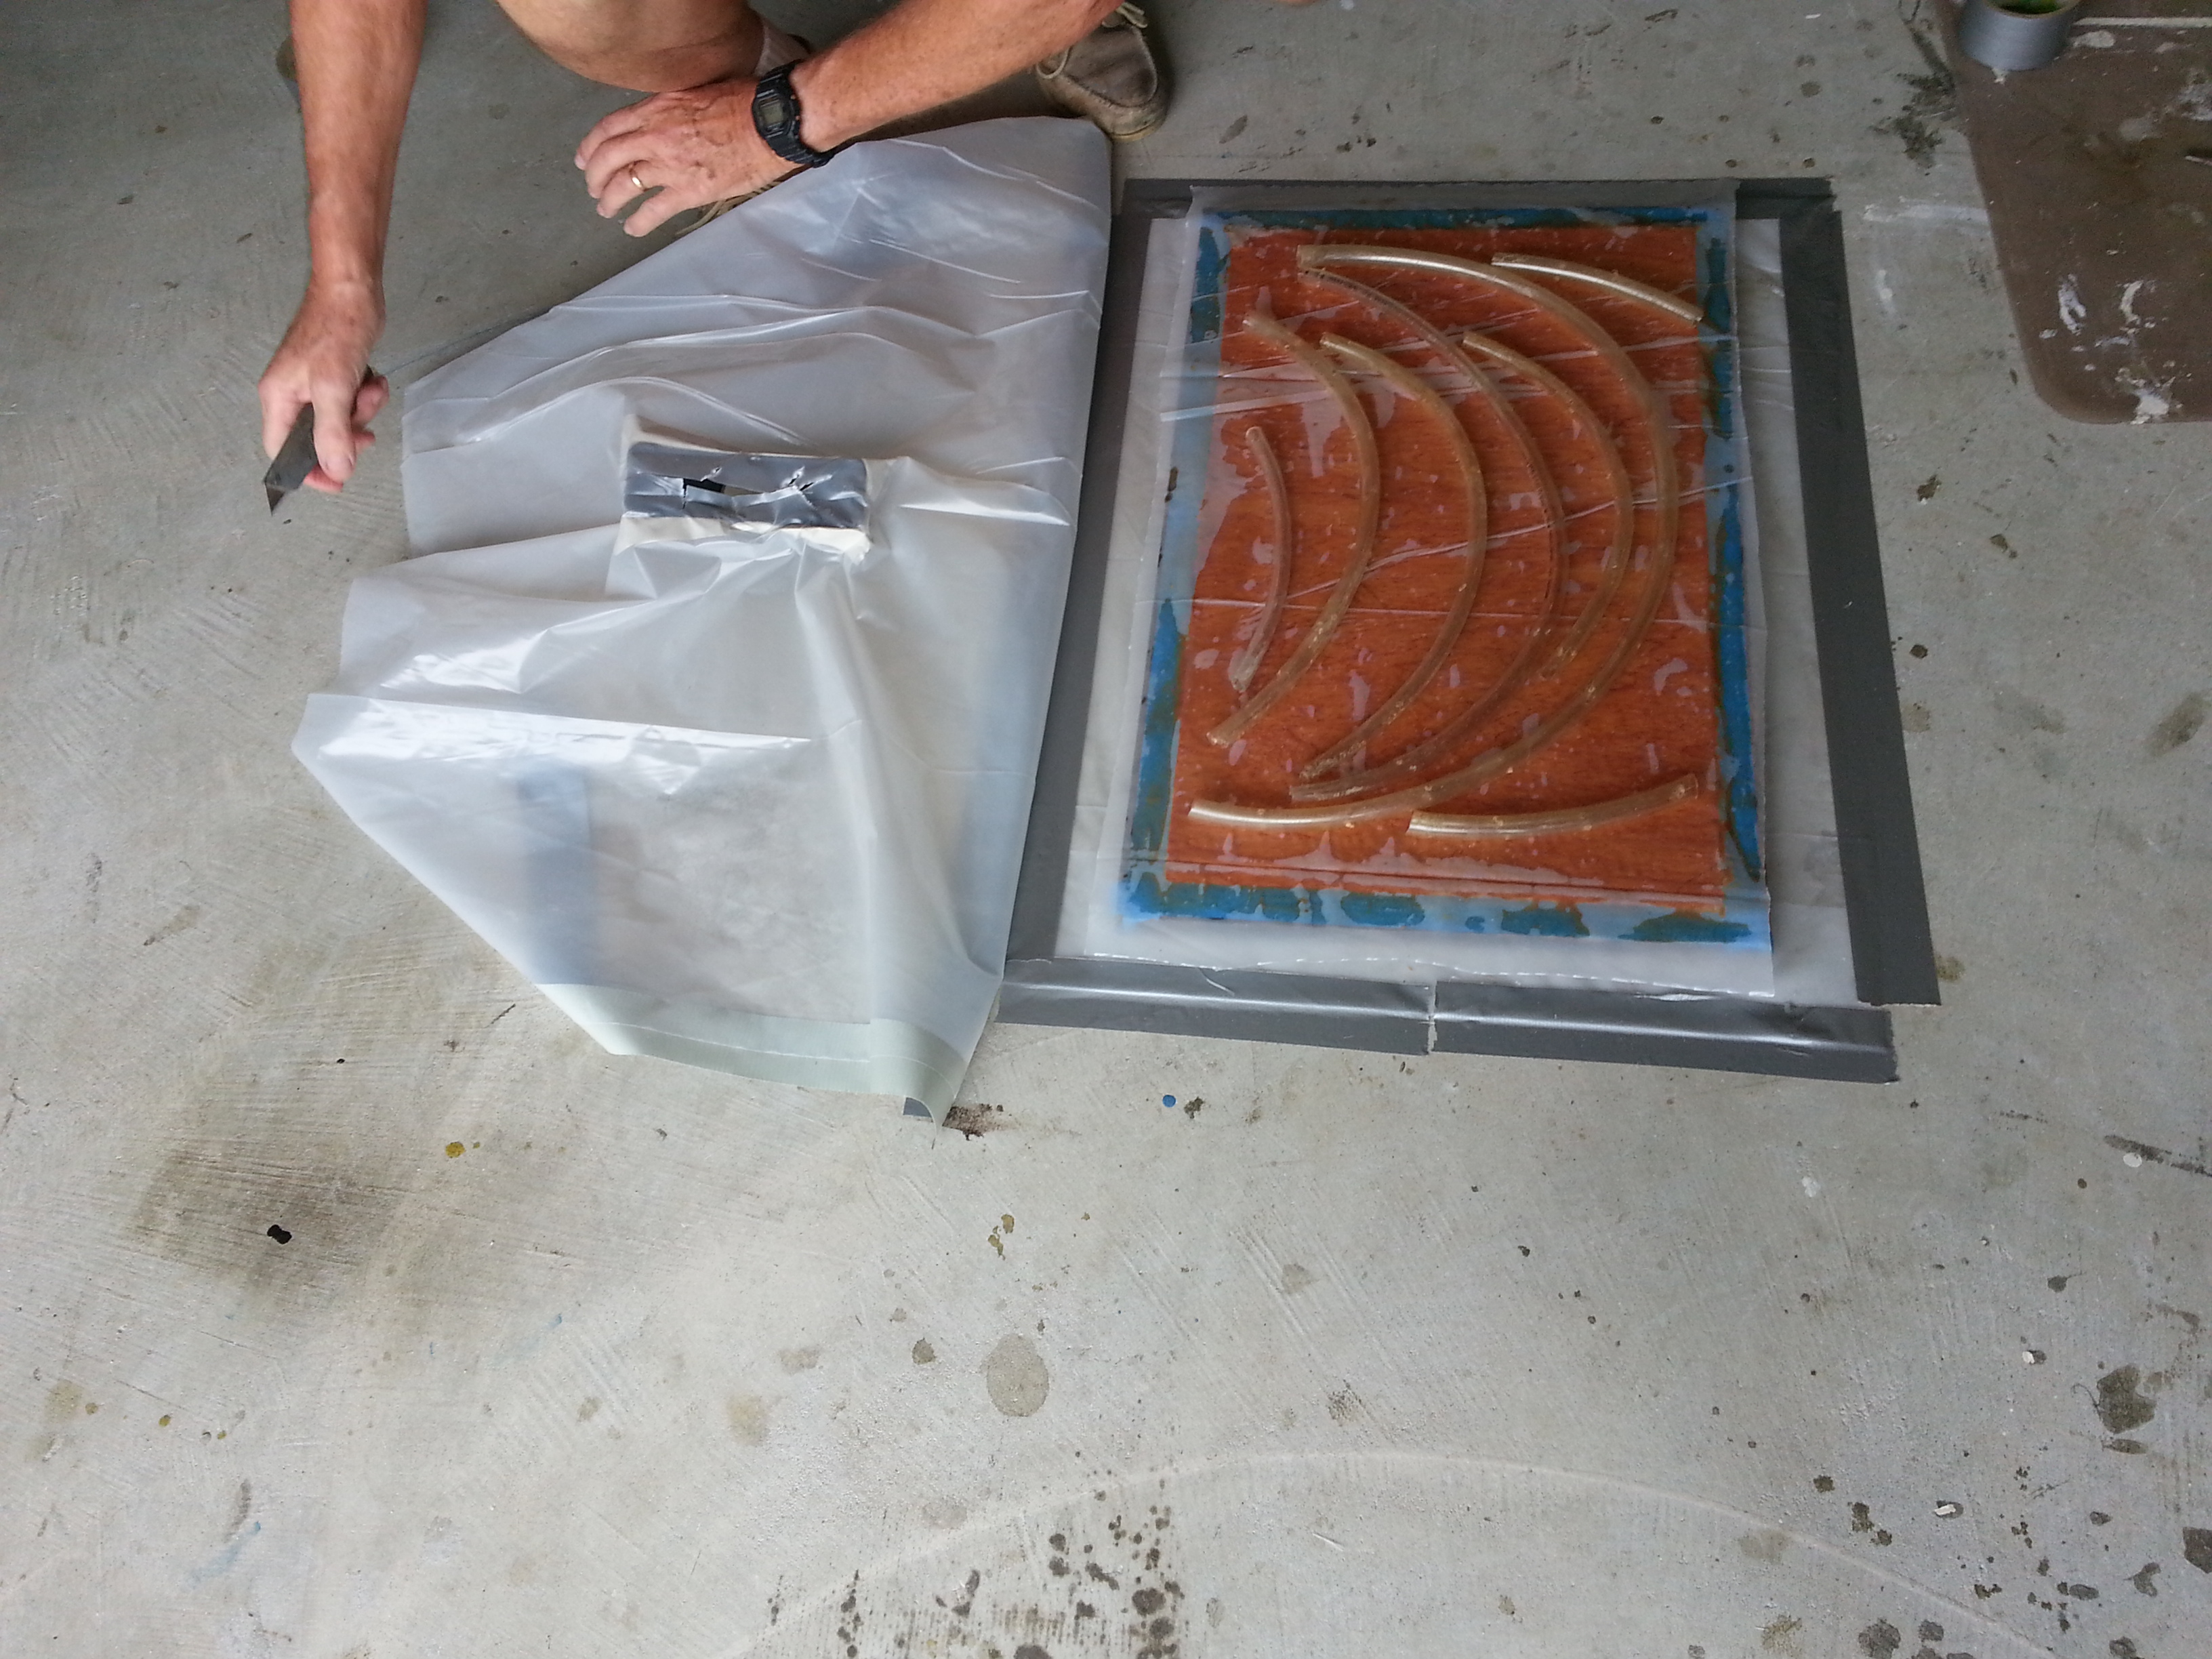
#7 – Deck with new core inside frame. Plastic sheet covering frame and header tubes. Ready to place top of “bag” over the entire structure – shown with vacuum nozzle already taped into place. Easiest way of attaching the nozzle is to tape it in place (it should cross over several header tubes) then cut a slot in the plastic under the nozzle to allow vacuum to “pull” throughout the setup.
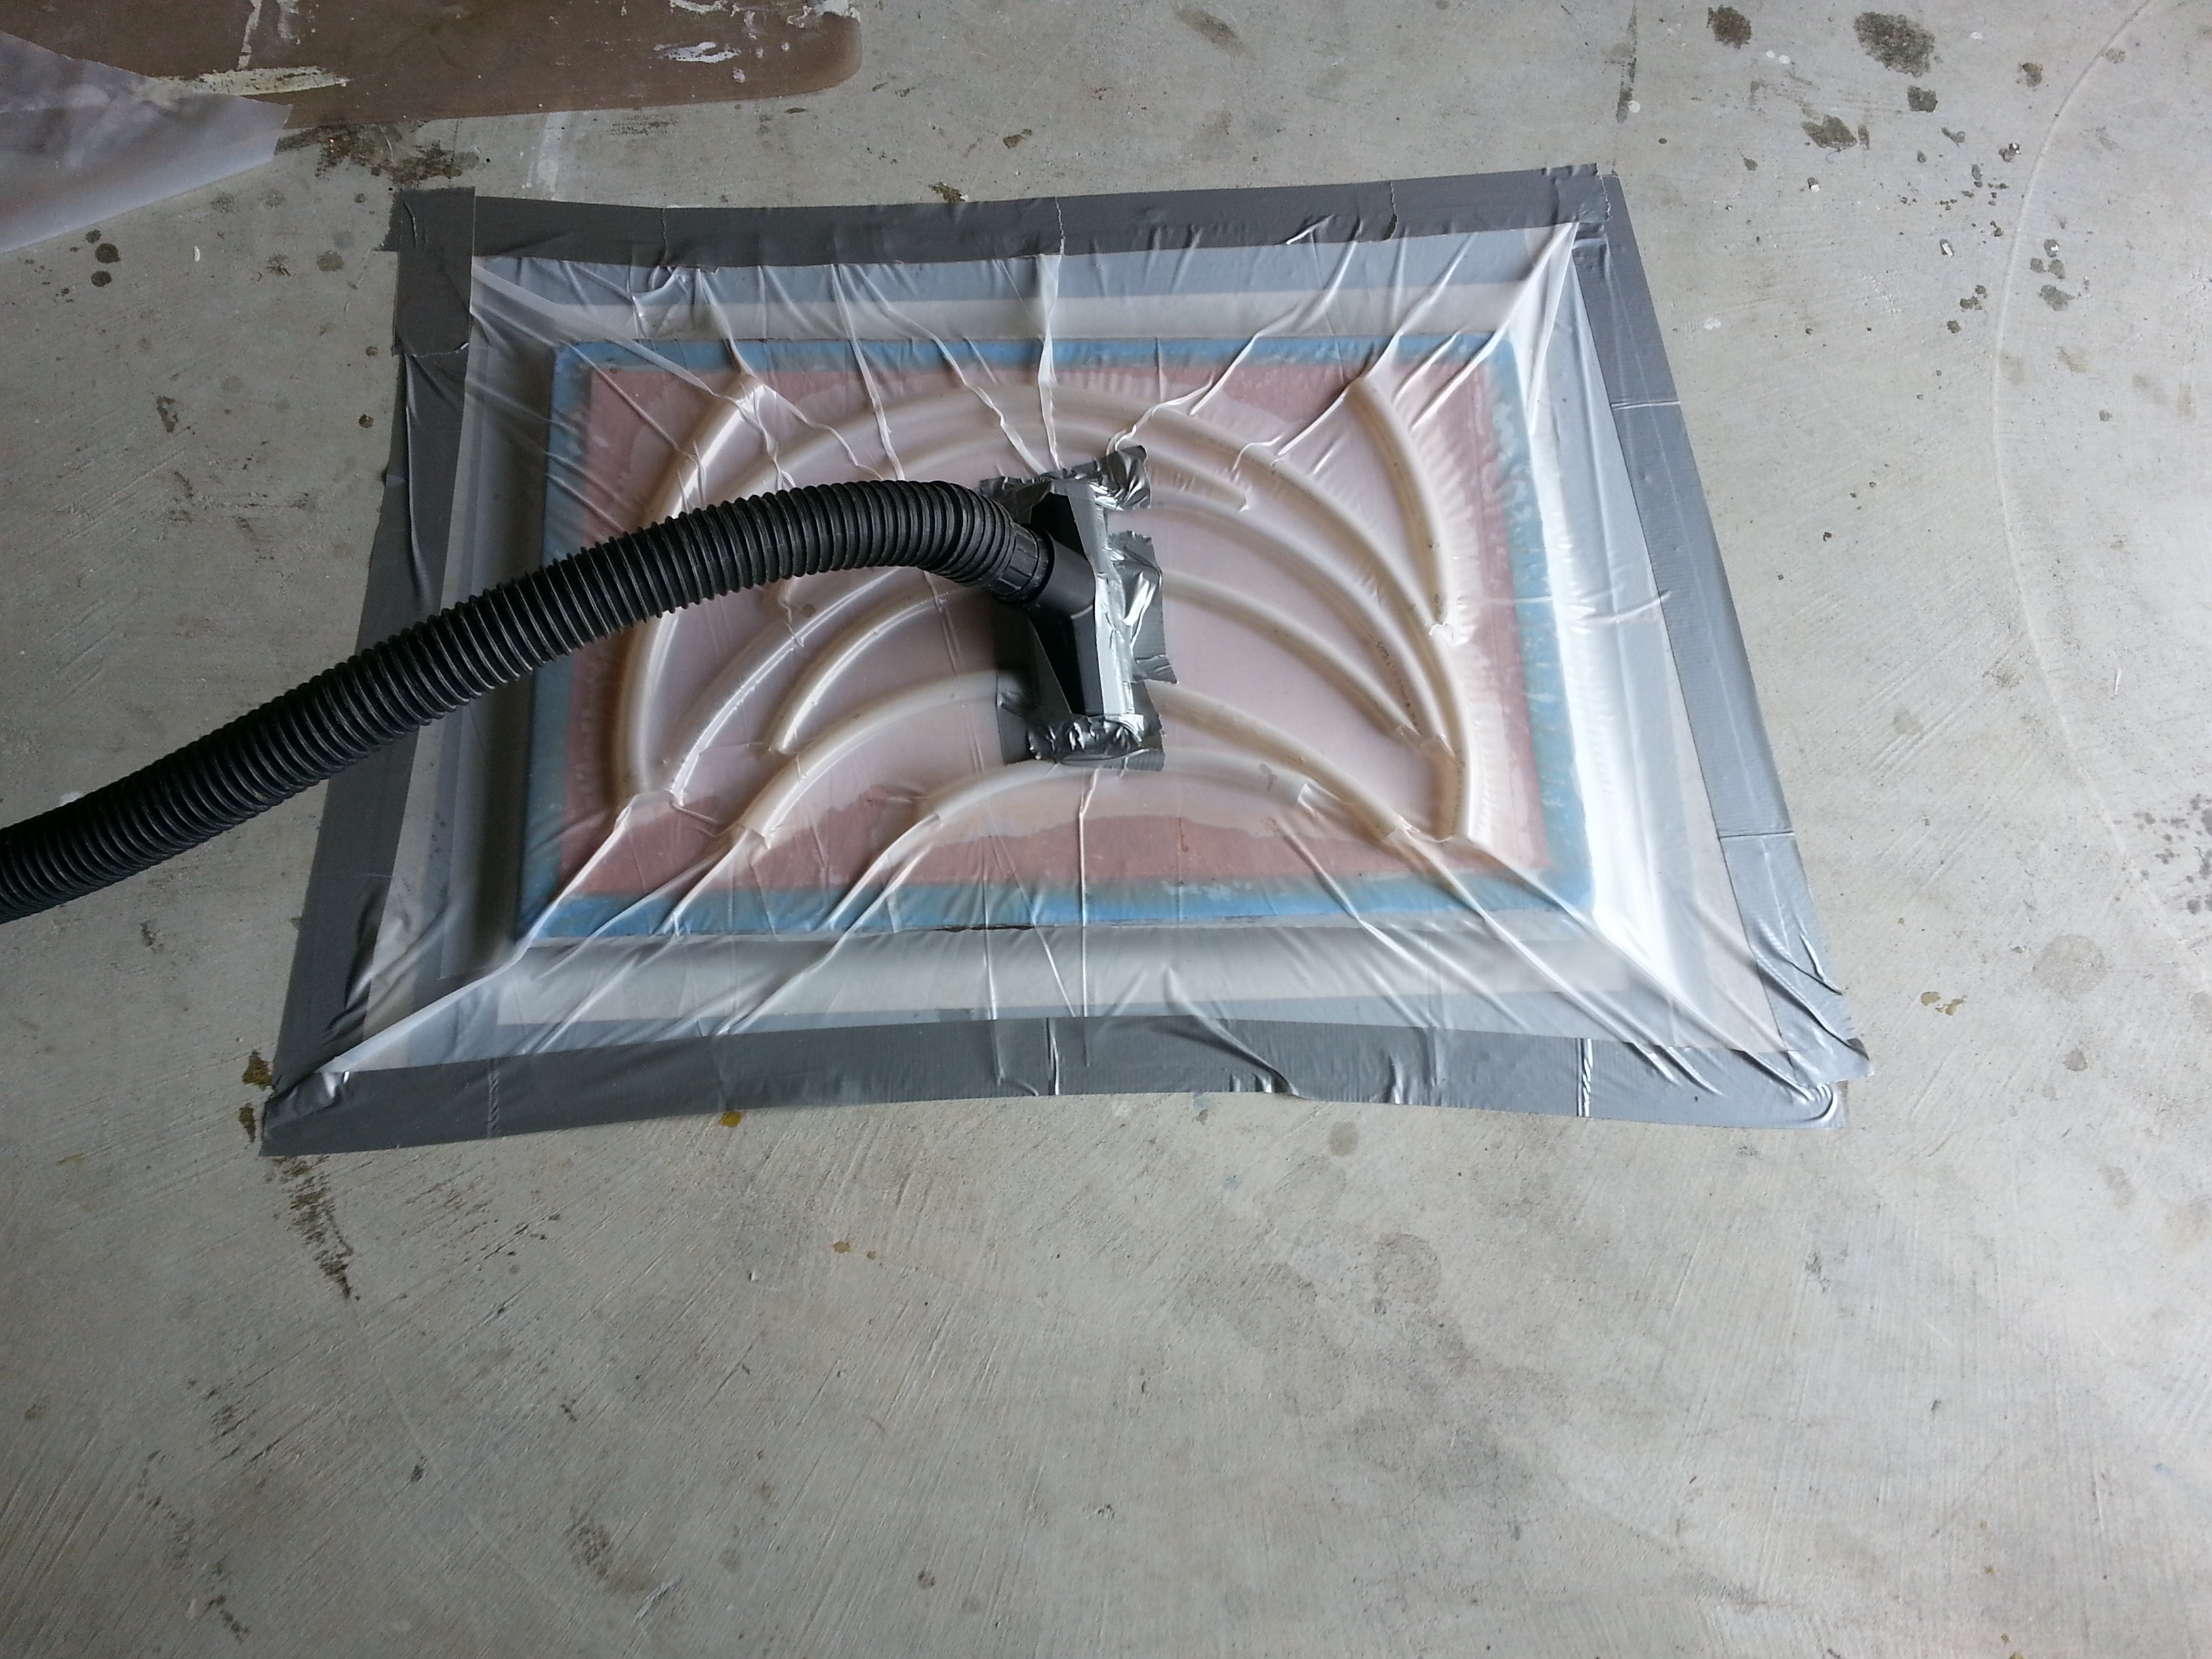
#8 – Vacuum applied. Header tubes of 3/8″ plastic tubing with holes drilled through about every 2-3 inches shown in place under top layer of “bag” taped to deck outside the bottom layer of plastic. Carpet nozzle taped over slot cut in top layer of the bag, with hose leading to shop vac. The header can also consist of any size of rope coiled around the area to be bagged, or even heavy screen wire; use what is handy.
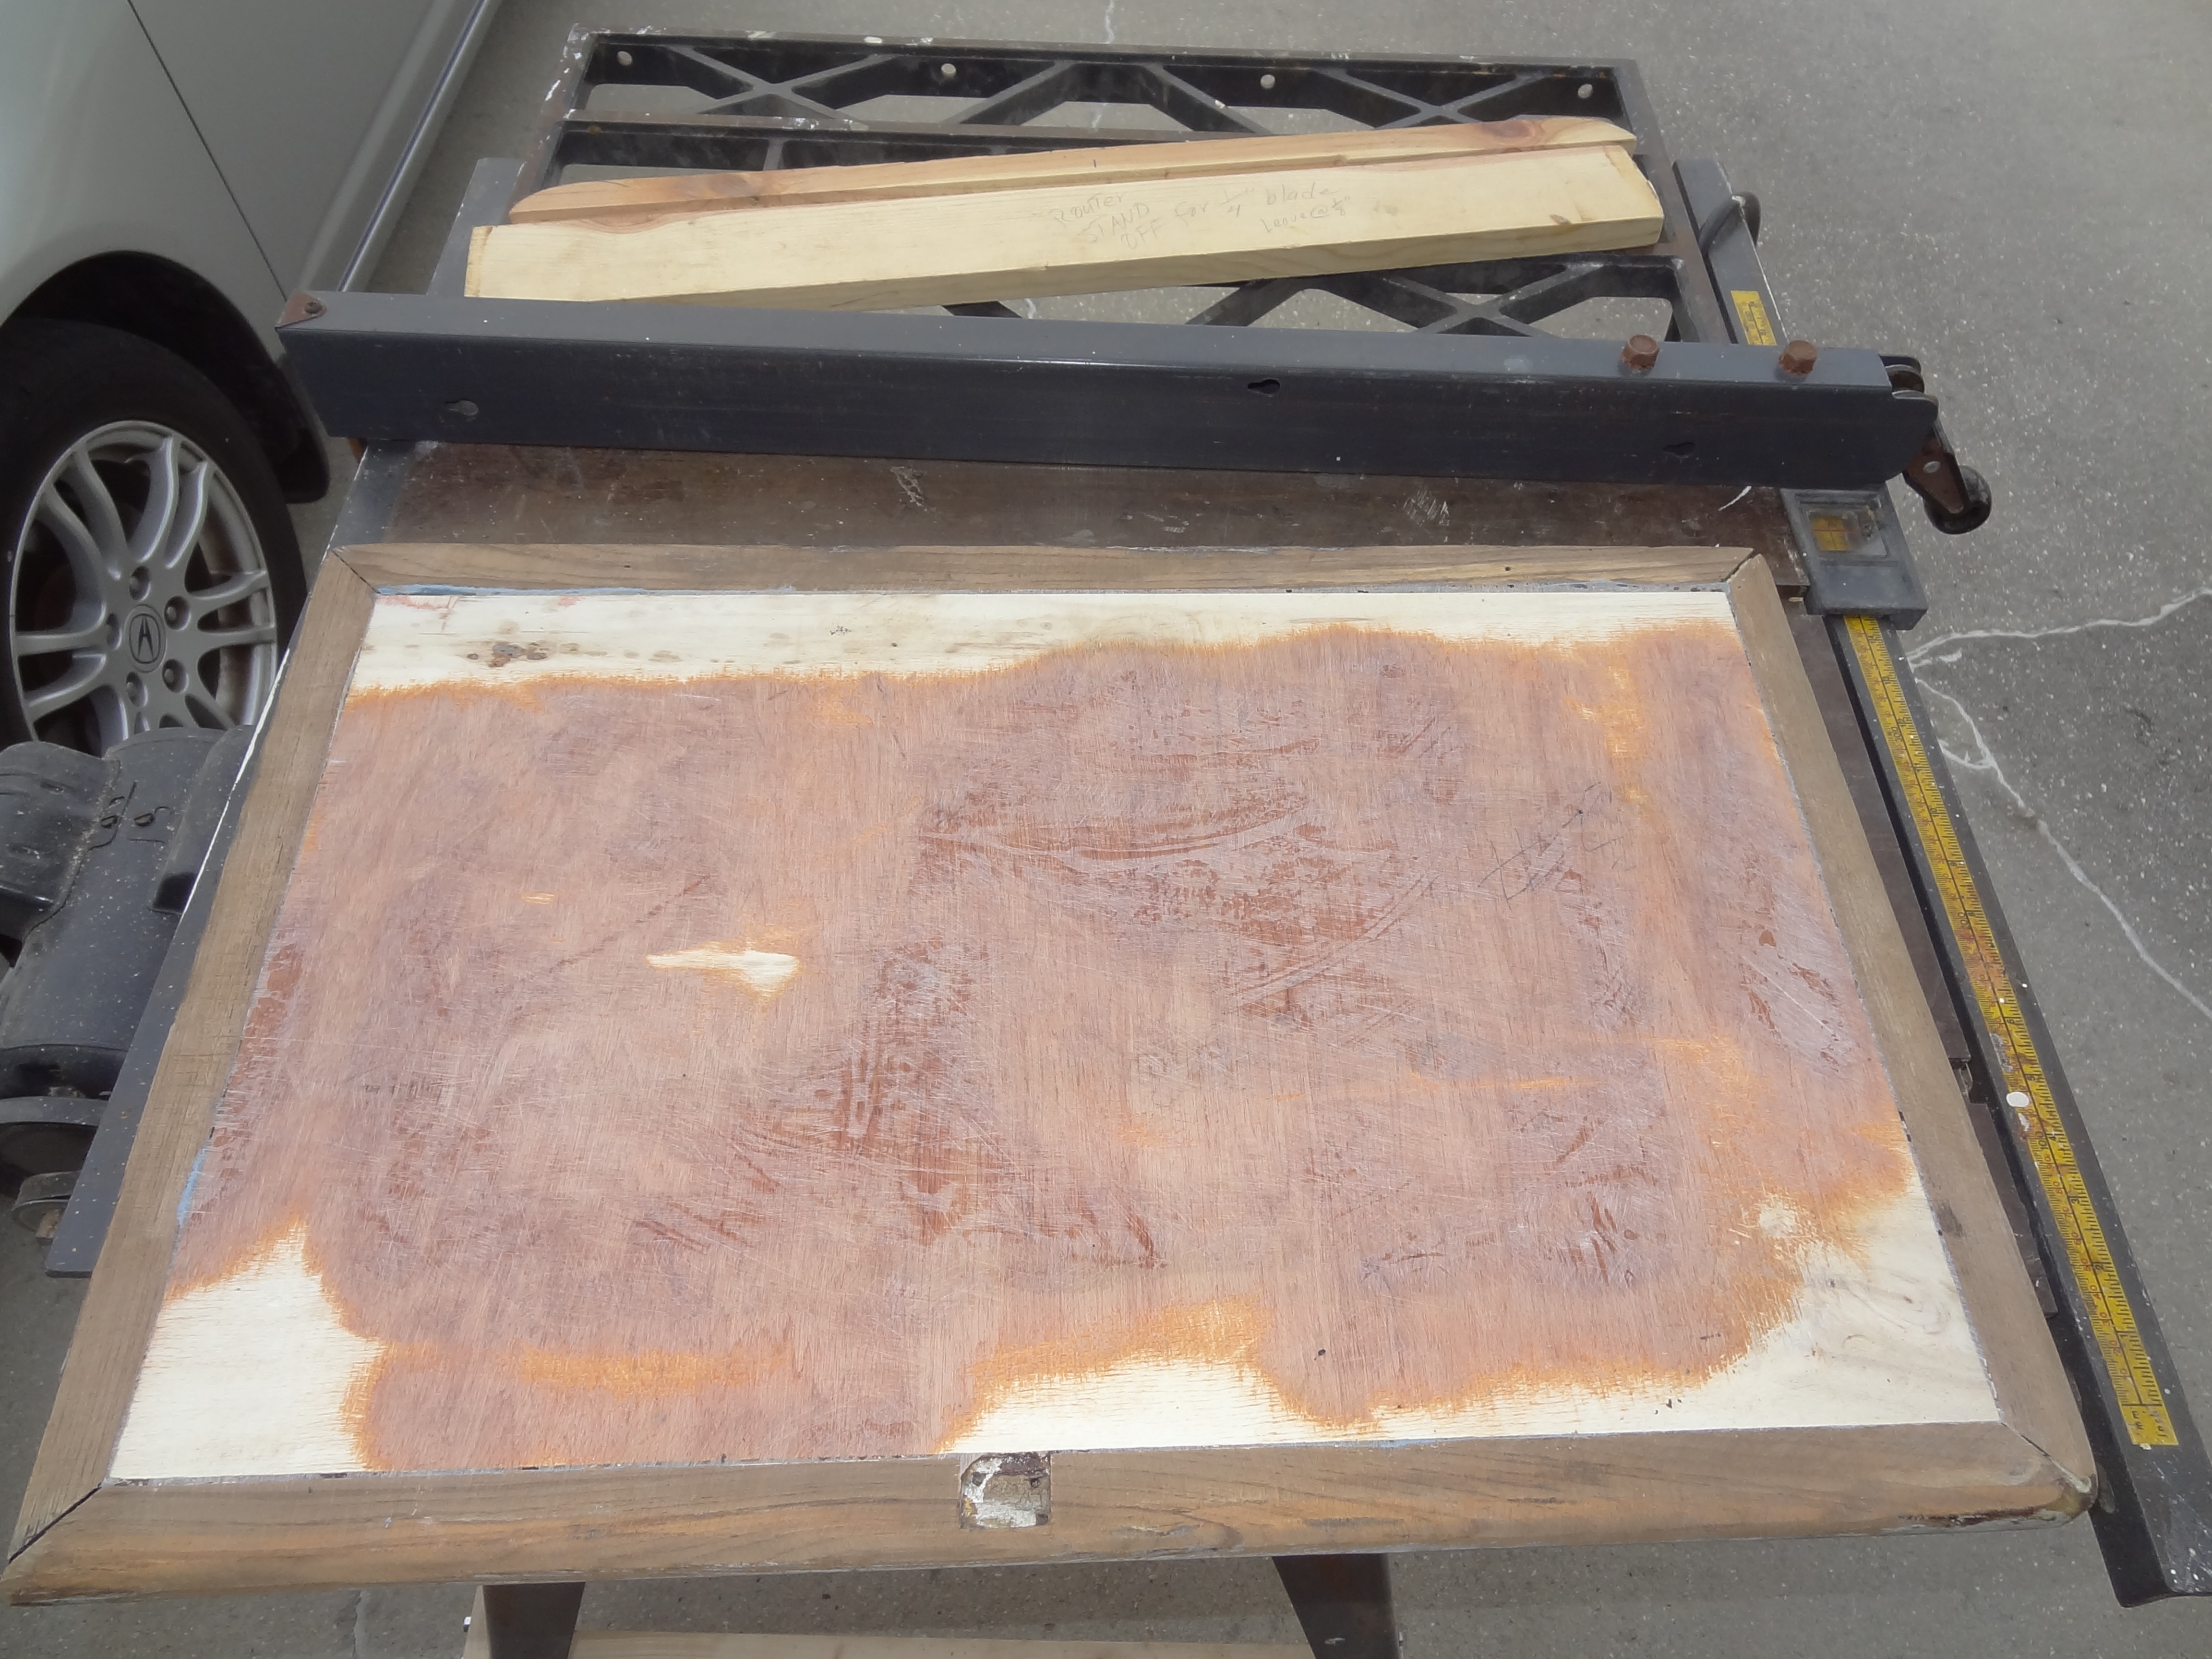
#9 – Underside sanded – only a few parts of the edges stood proud of the frame – coated with CPES for added protection before reinstalling on Sanderling.
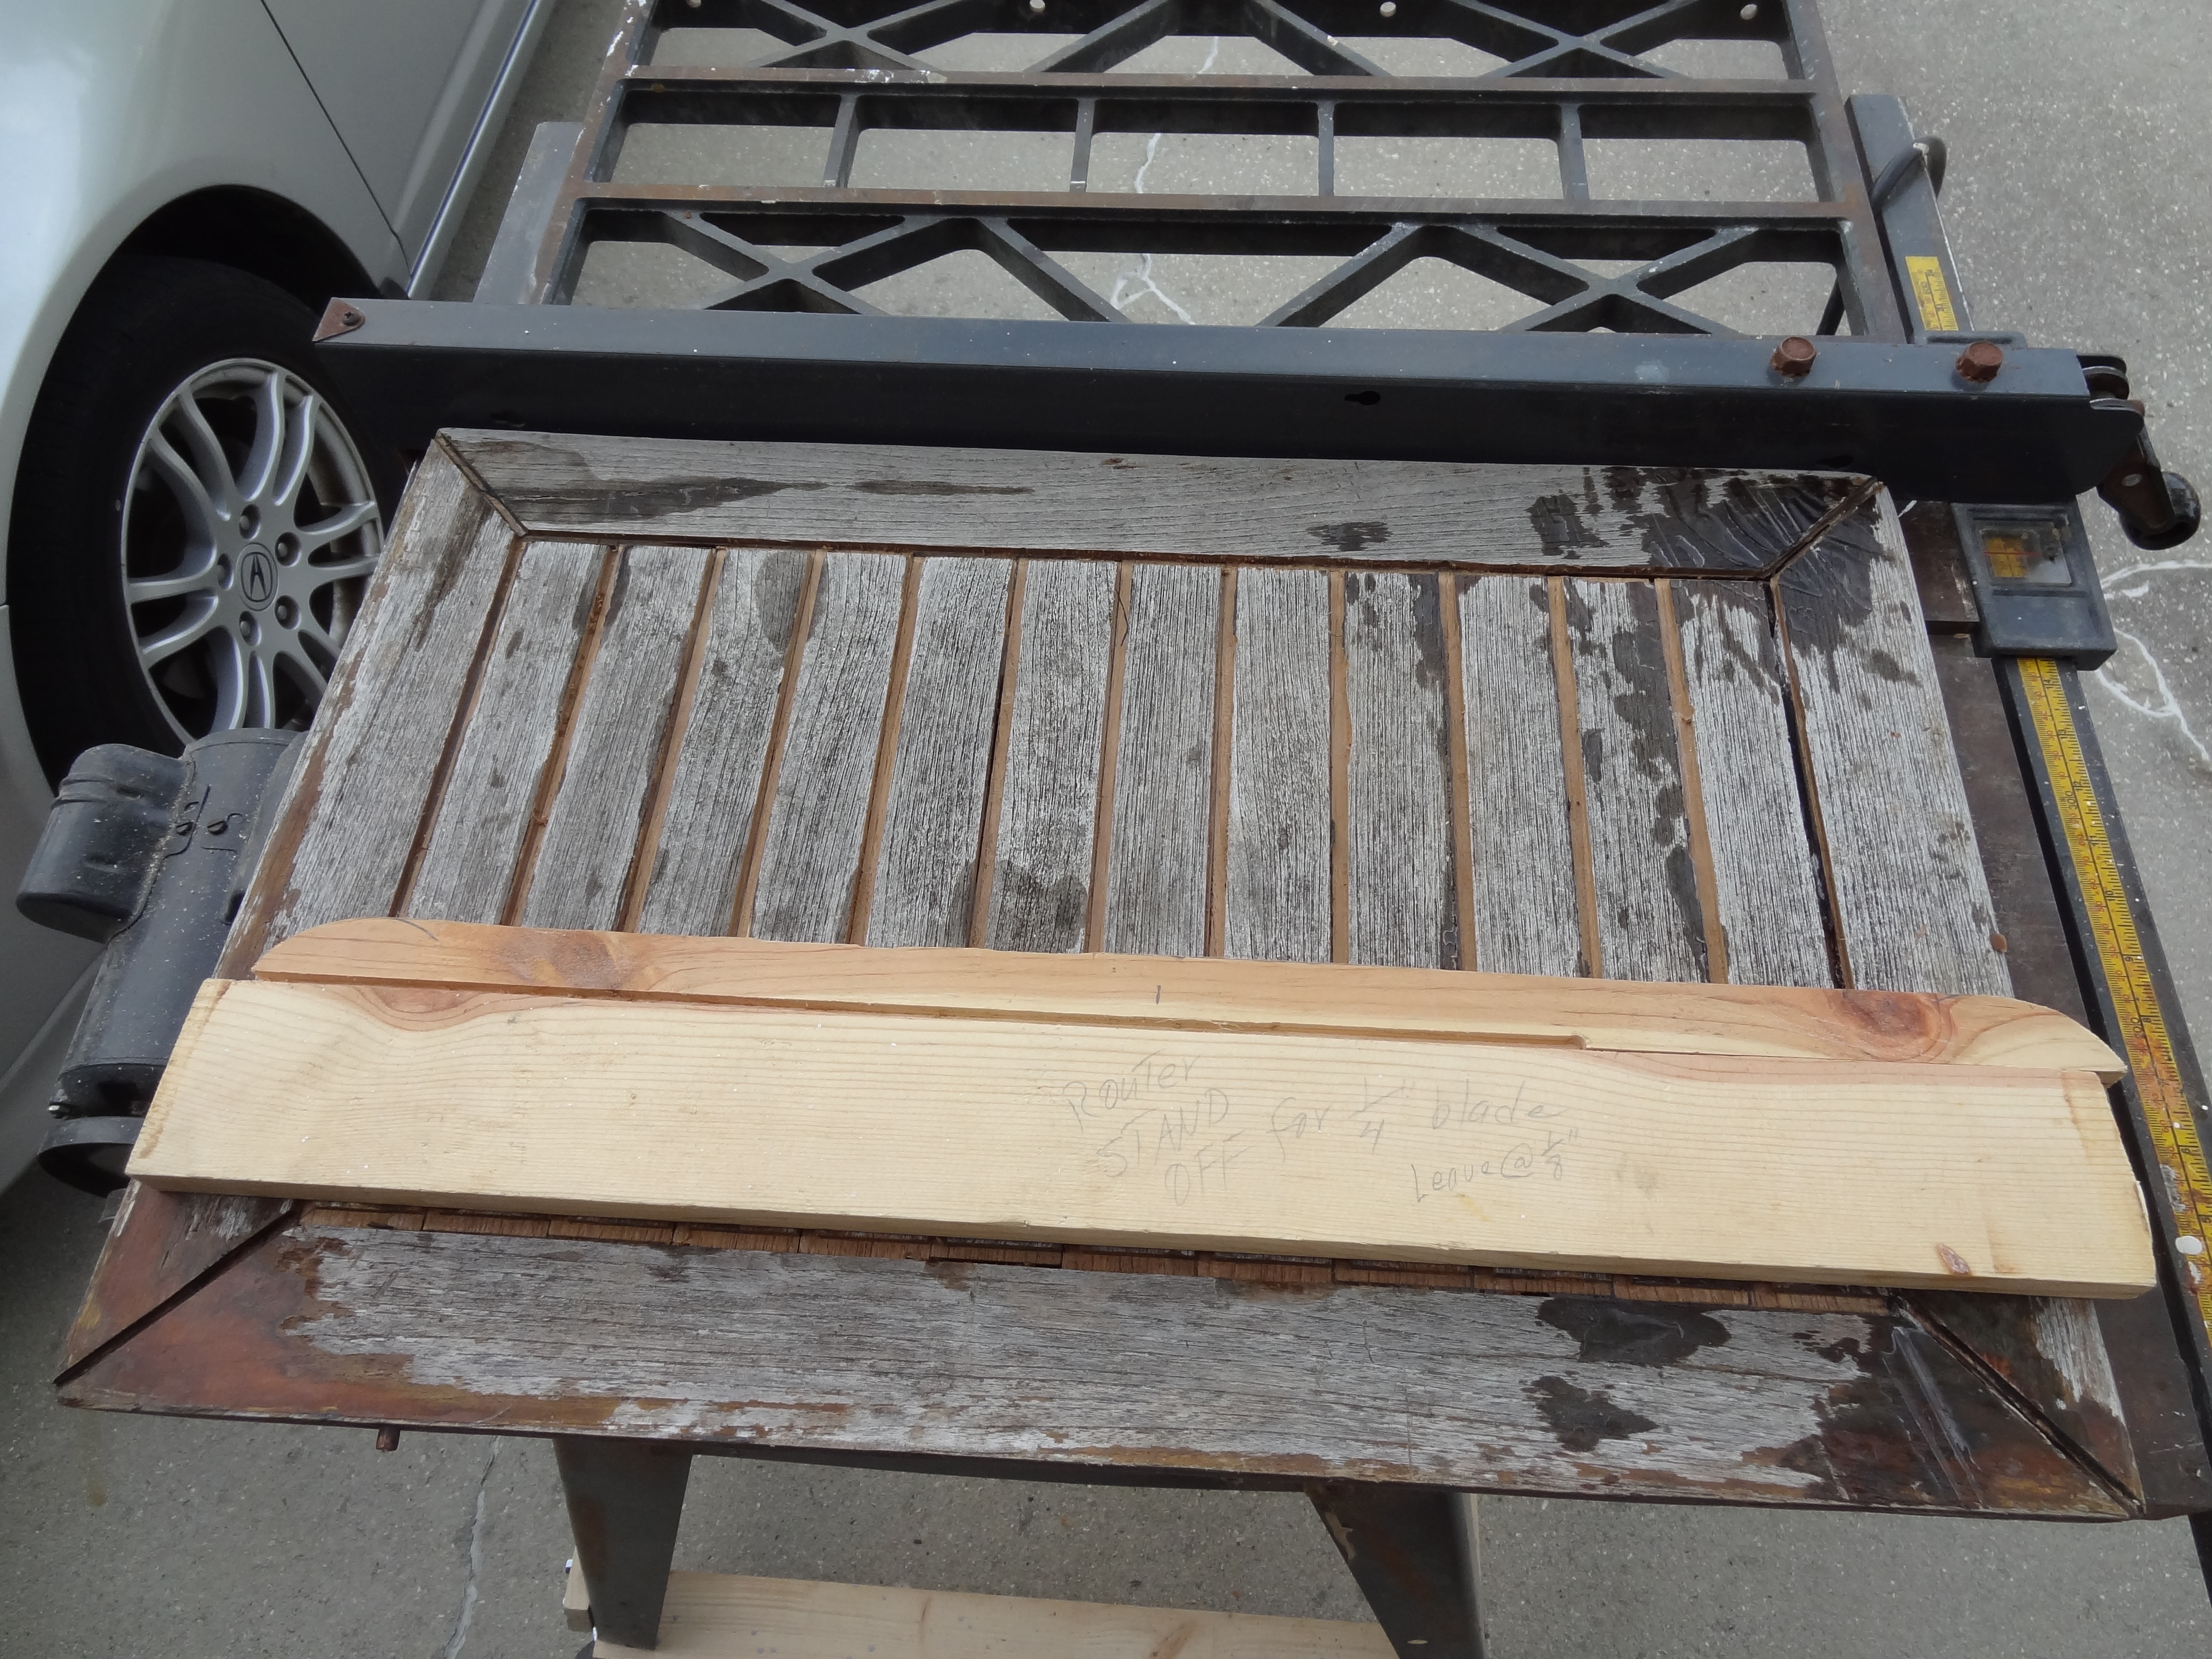
#10 – Deck after replacement of core structure. Grooves between 2″ teak strips are being routed with 1/4″ straight bit to depth of about 3/16″ prior to pouring black epoxy.
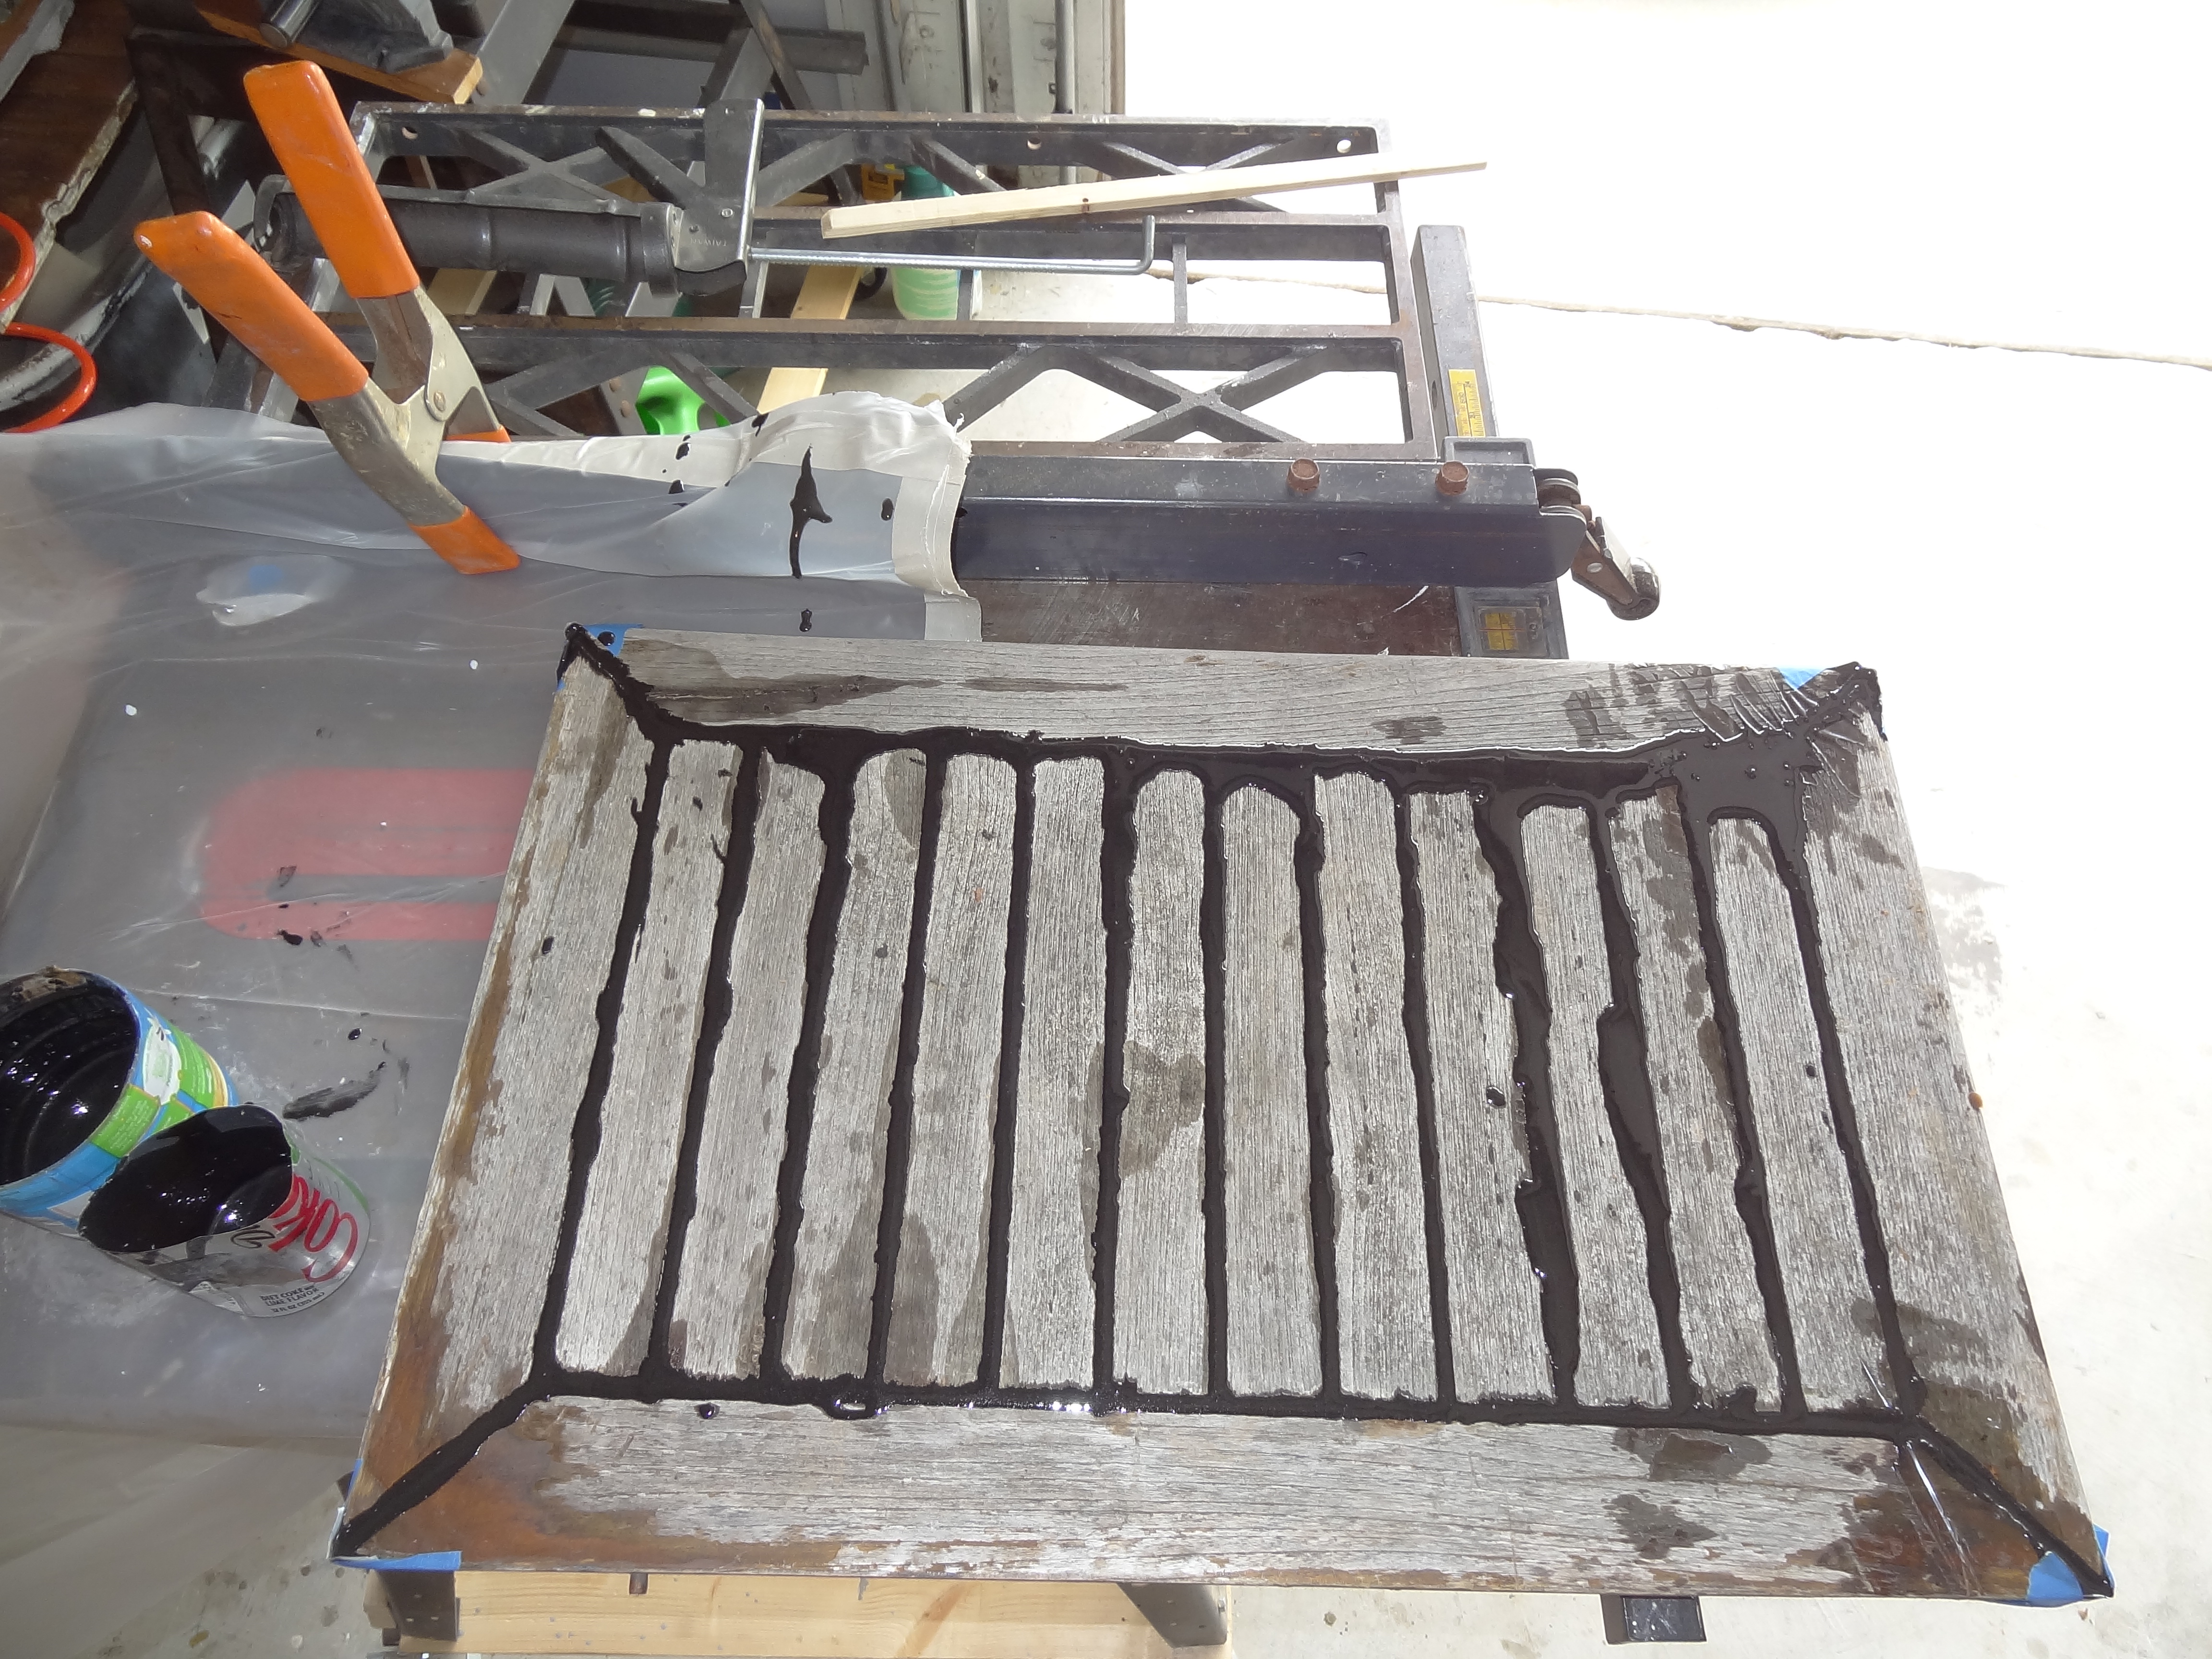
#11 – Topside of deck (before sanding) after adding thickened epoxy blackened with graphite powder to simulate deck caulk.

#12 – Finished – Deck sanded and ready to be placed back on line locker. No further finishing required – it will turn “deck gray” naturally as it is exposed to sunlight over time.